ོ࿐˖✶⊹₊𖦹 W.10 MAKING CONTINUATION 𖦹₊⊹✶ ࣪˖࿐ོ
CiD LAB CONSULTATION (MON)
This week's consultation duration is shorter than usual. With only 30 minutes to spare, I decided to only focus on my main concerns which are:
- ✶ Arudino Magnetic Reed Sensor
- ✶ Coding
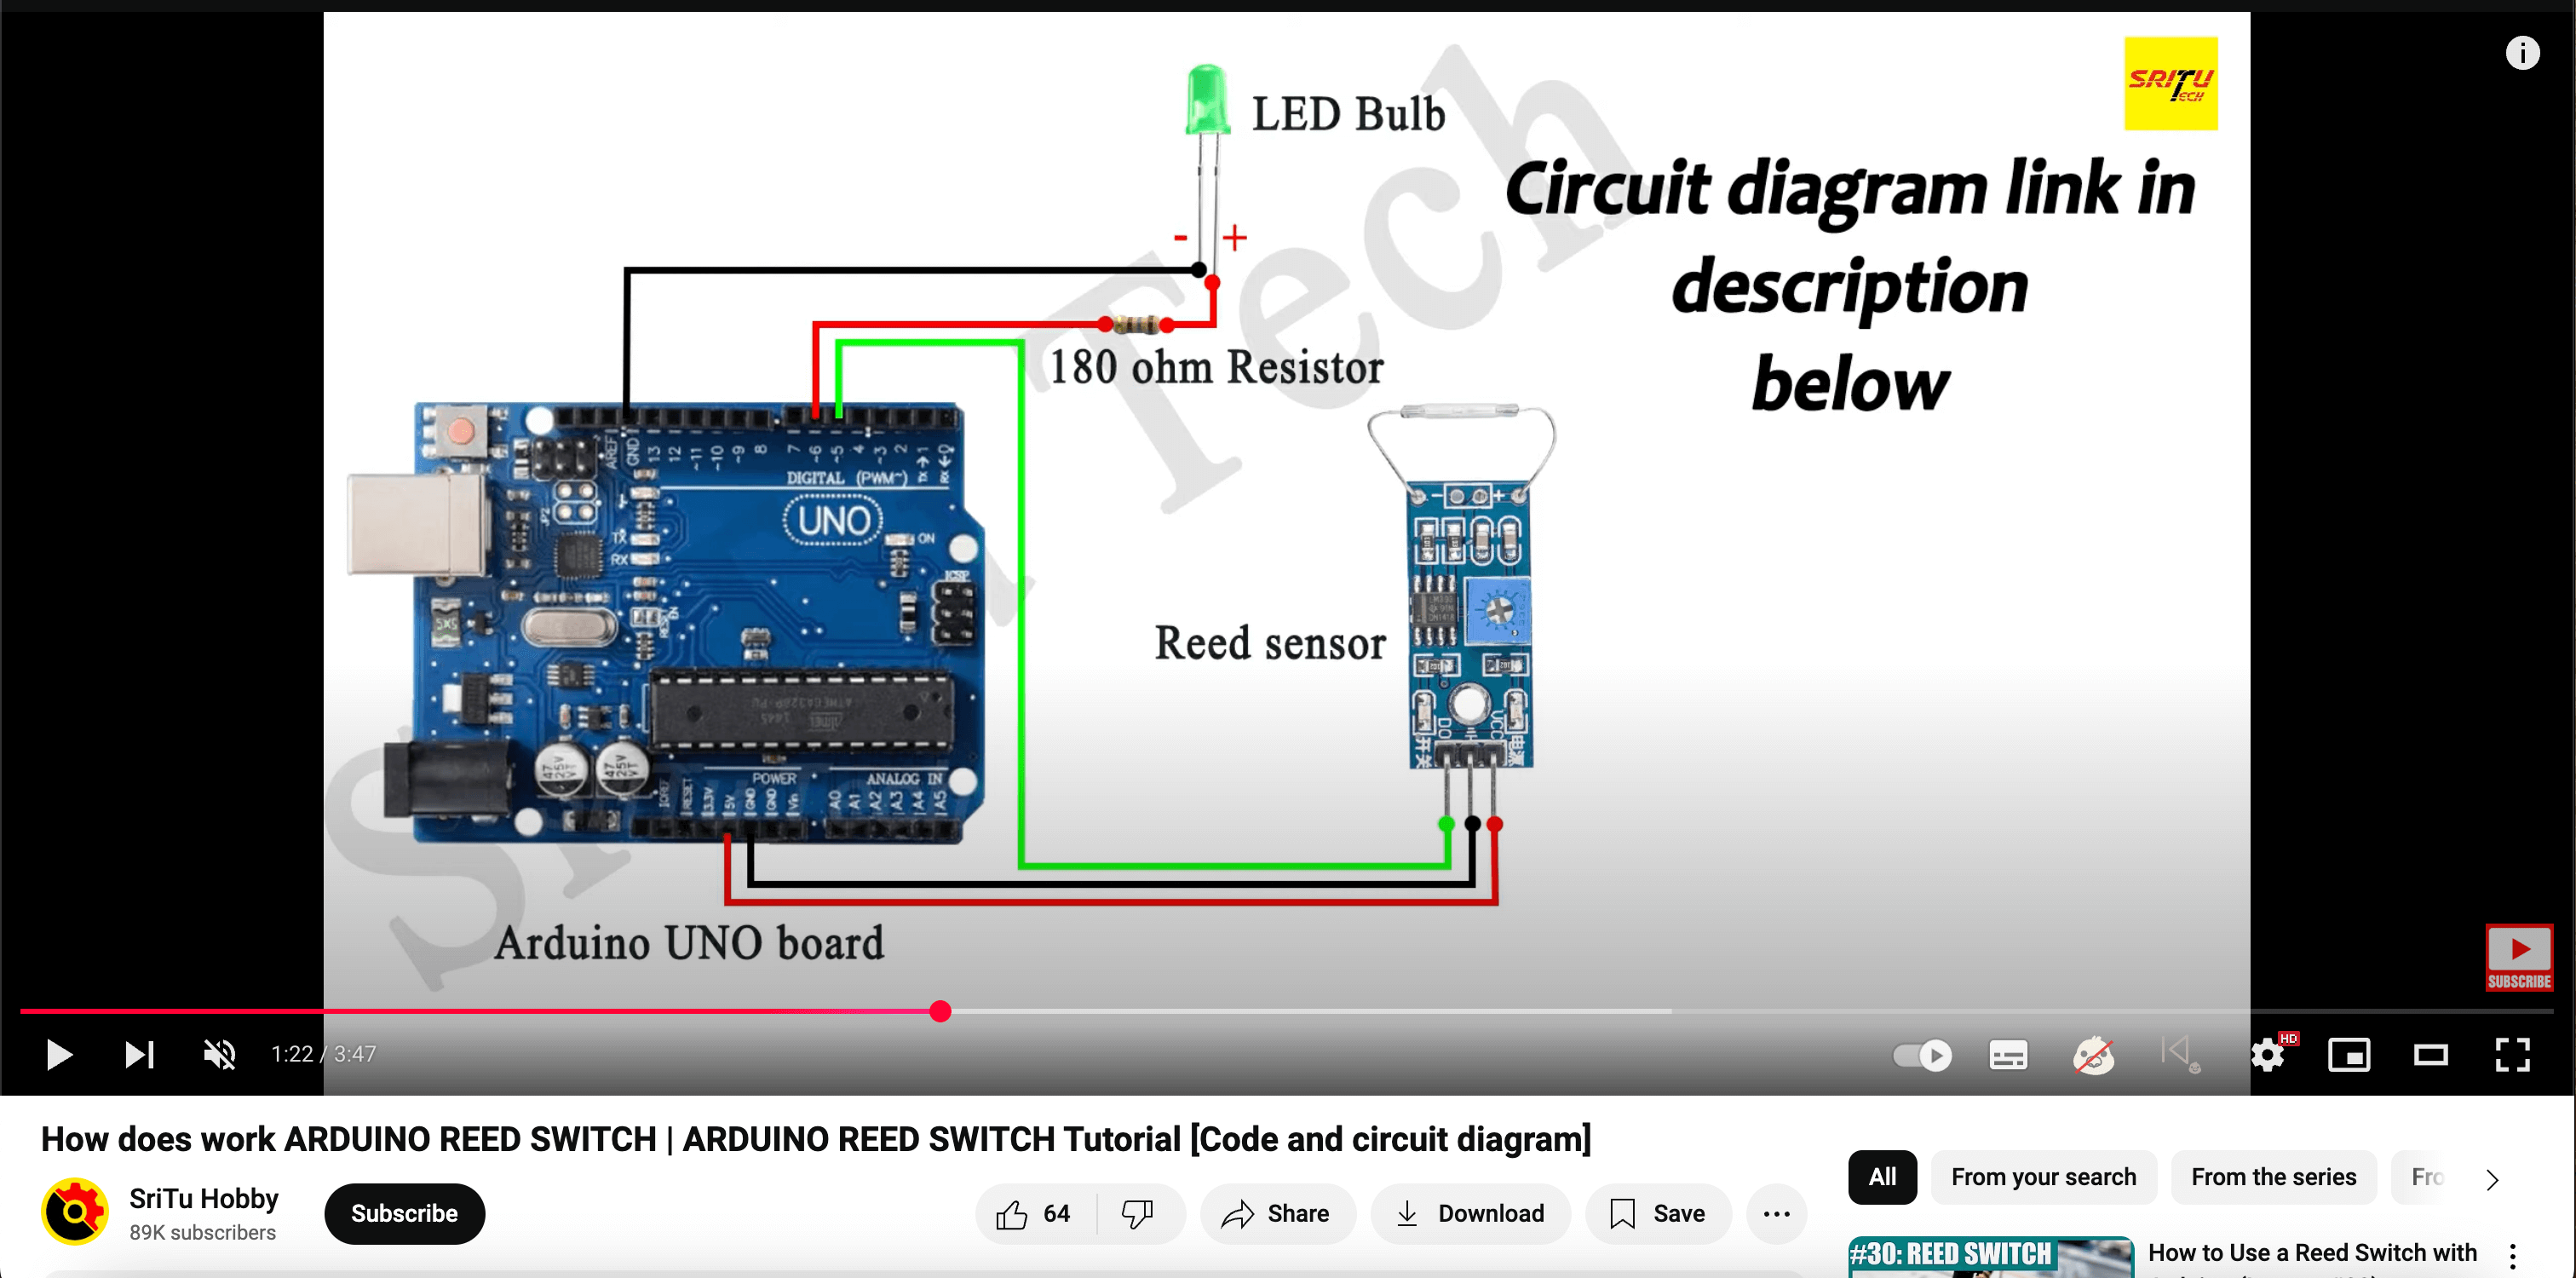
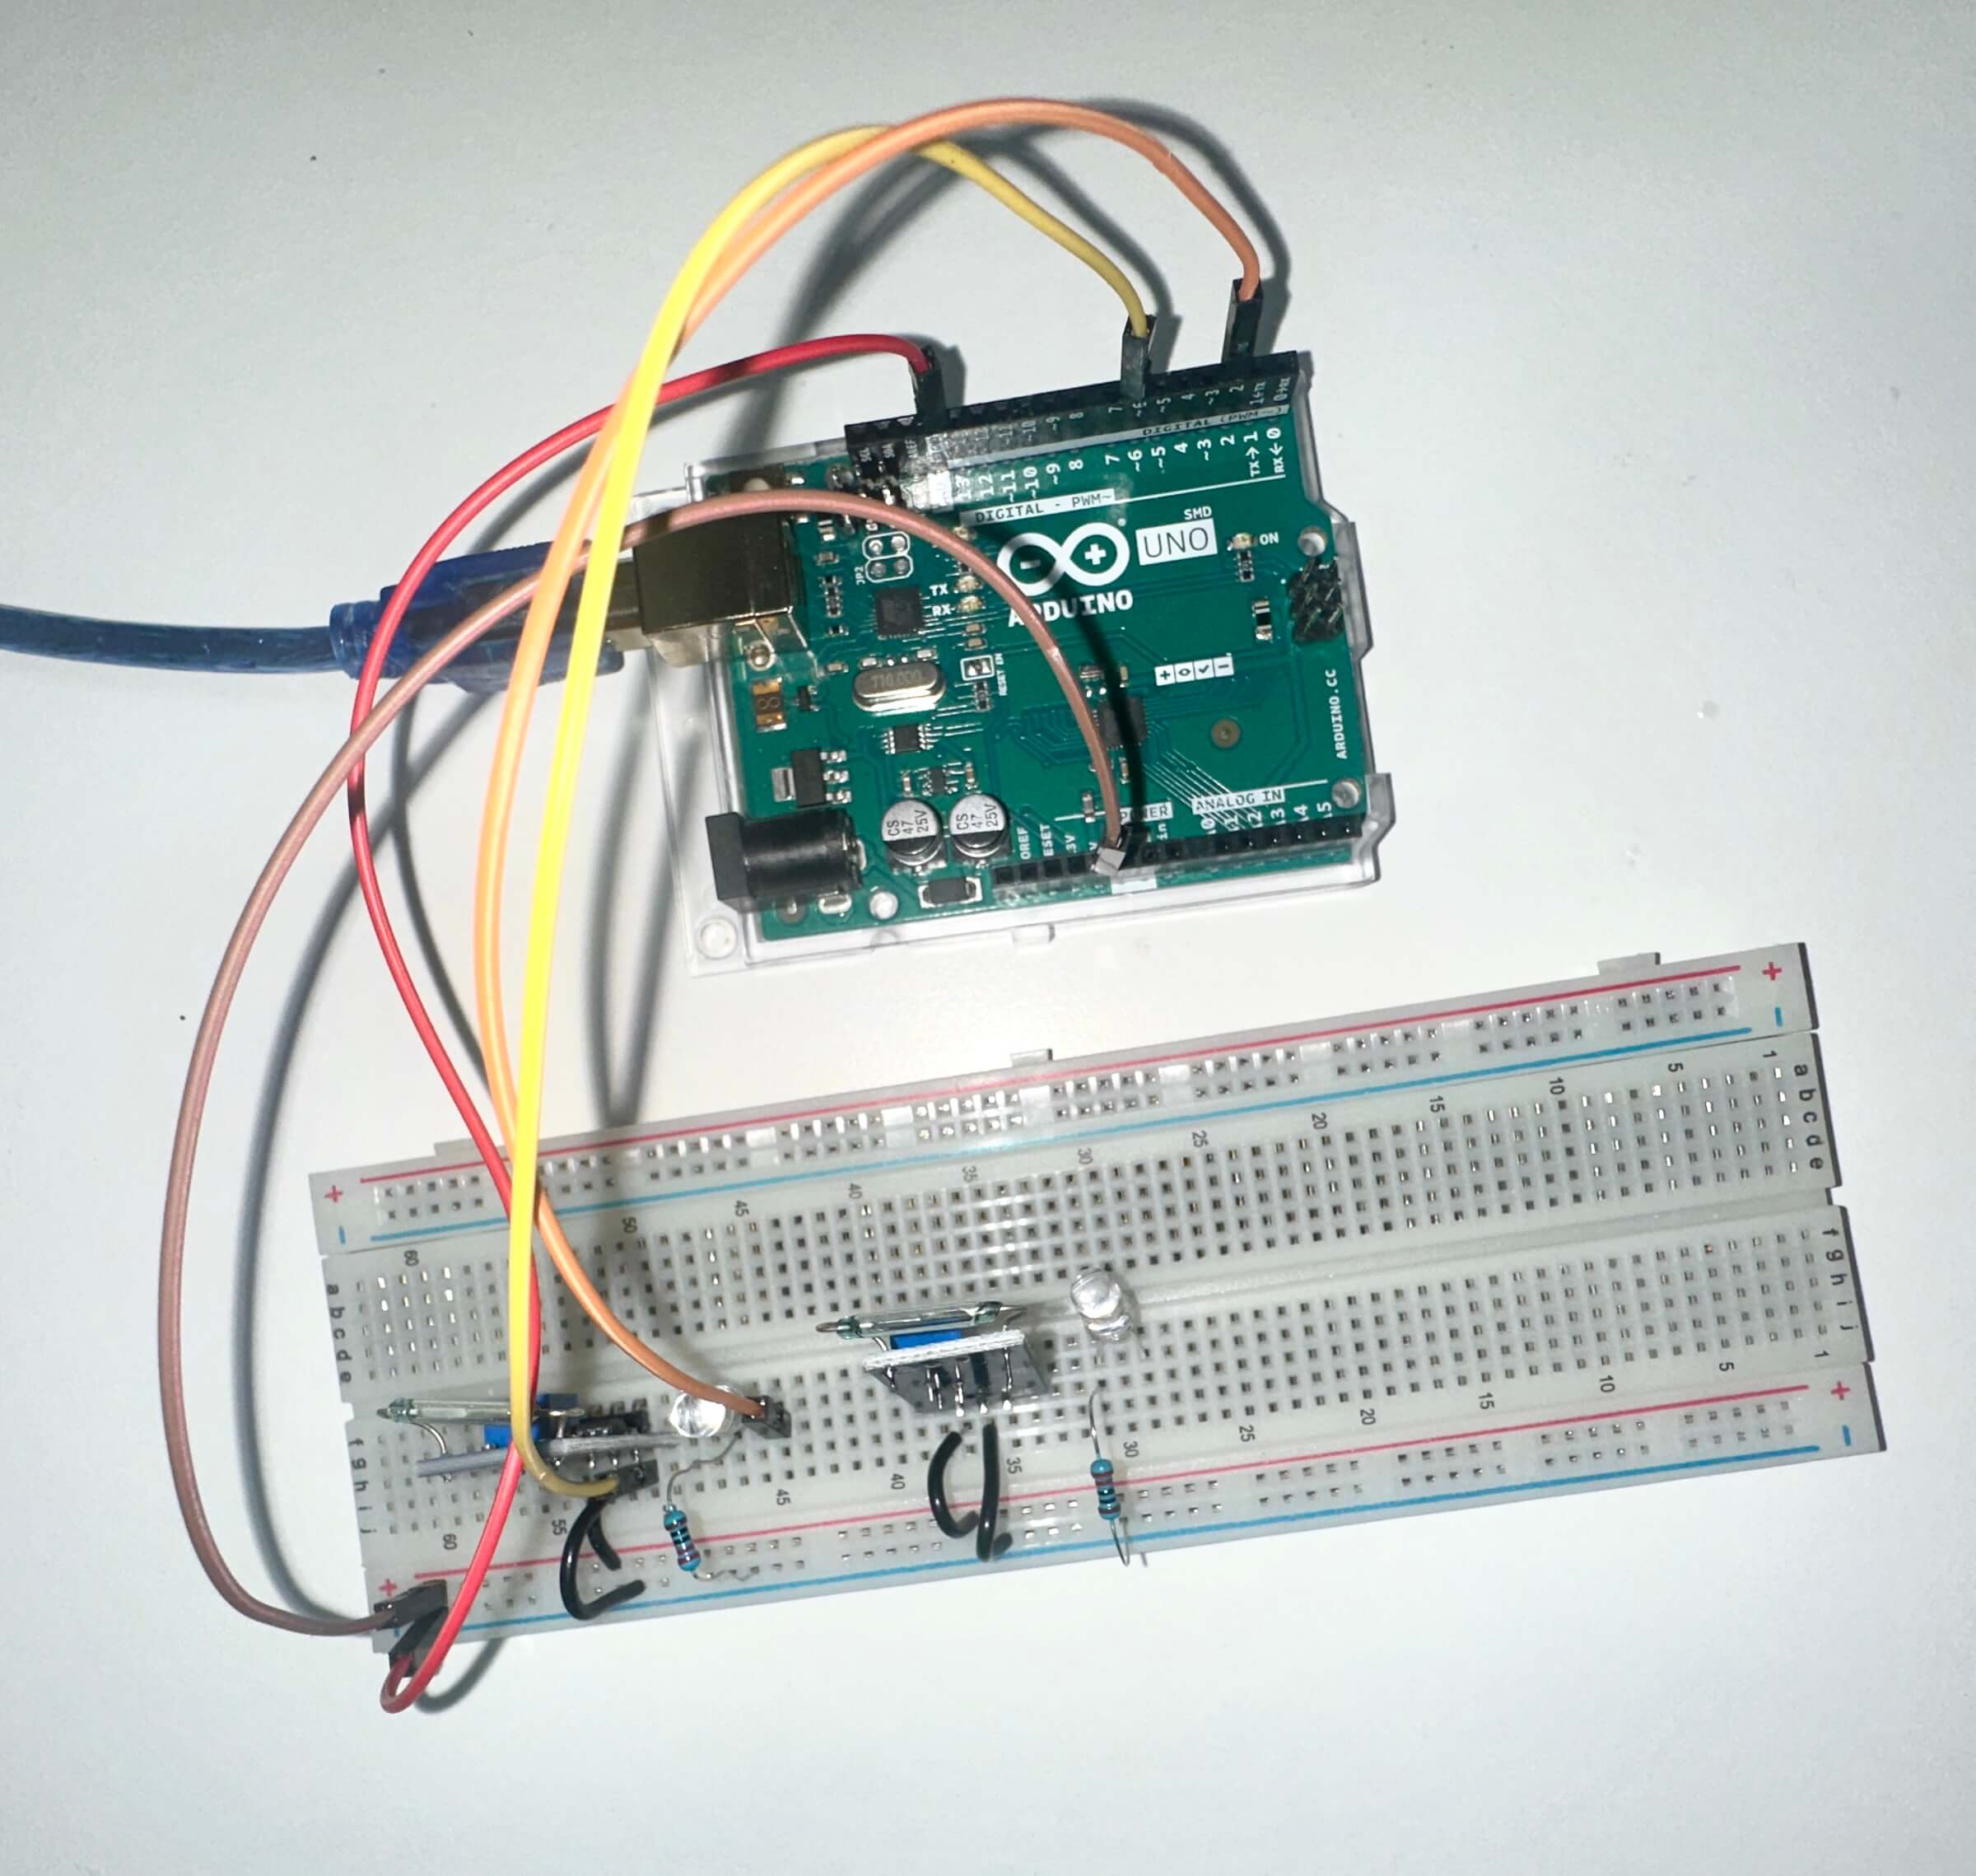
Andreas taught me how to connect the reed switches and coded a simple code to test it out with the Arduino.
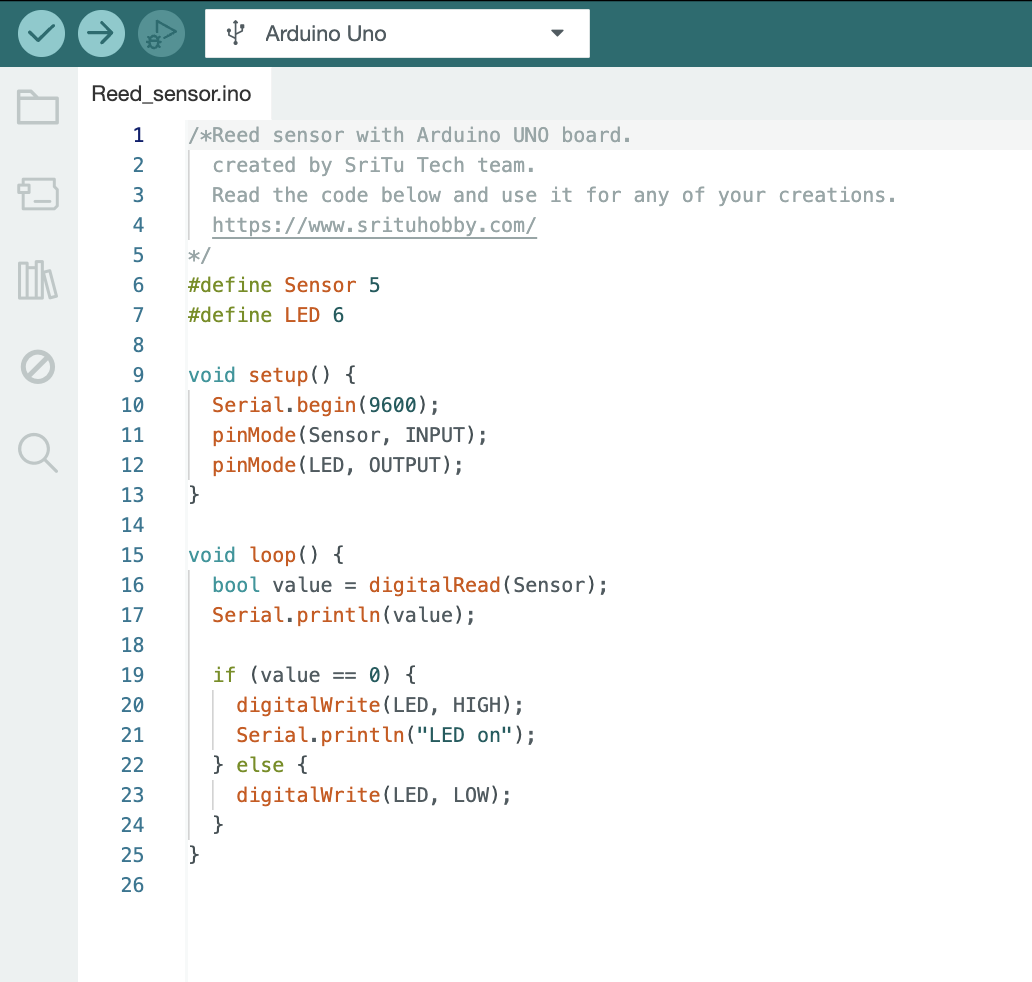
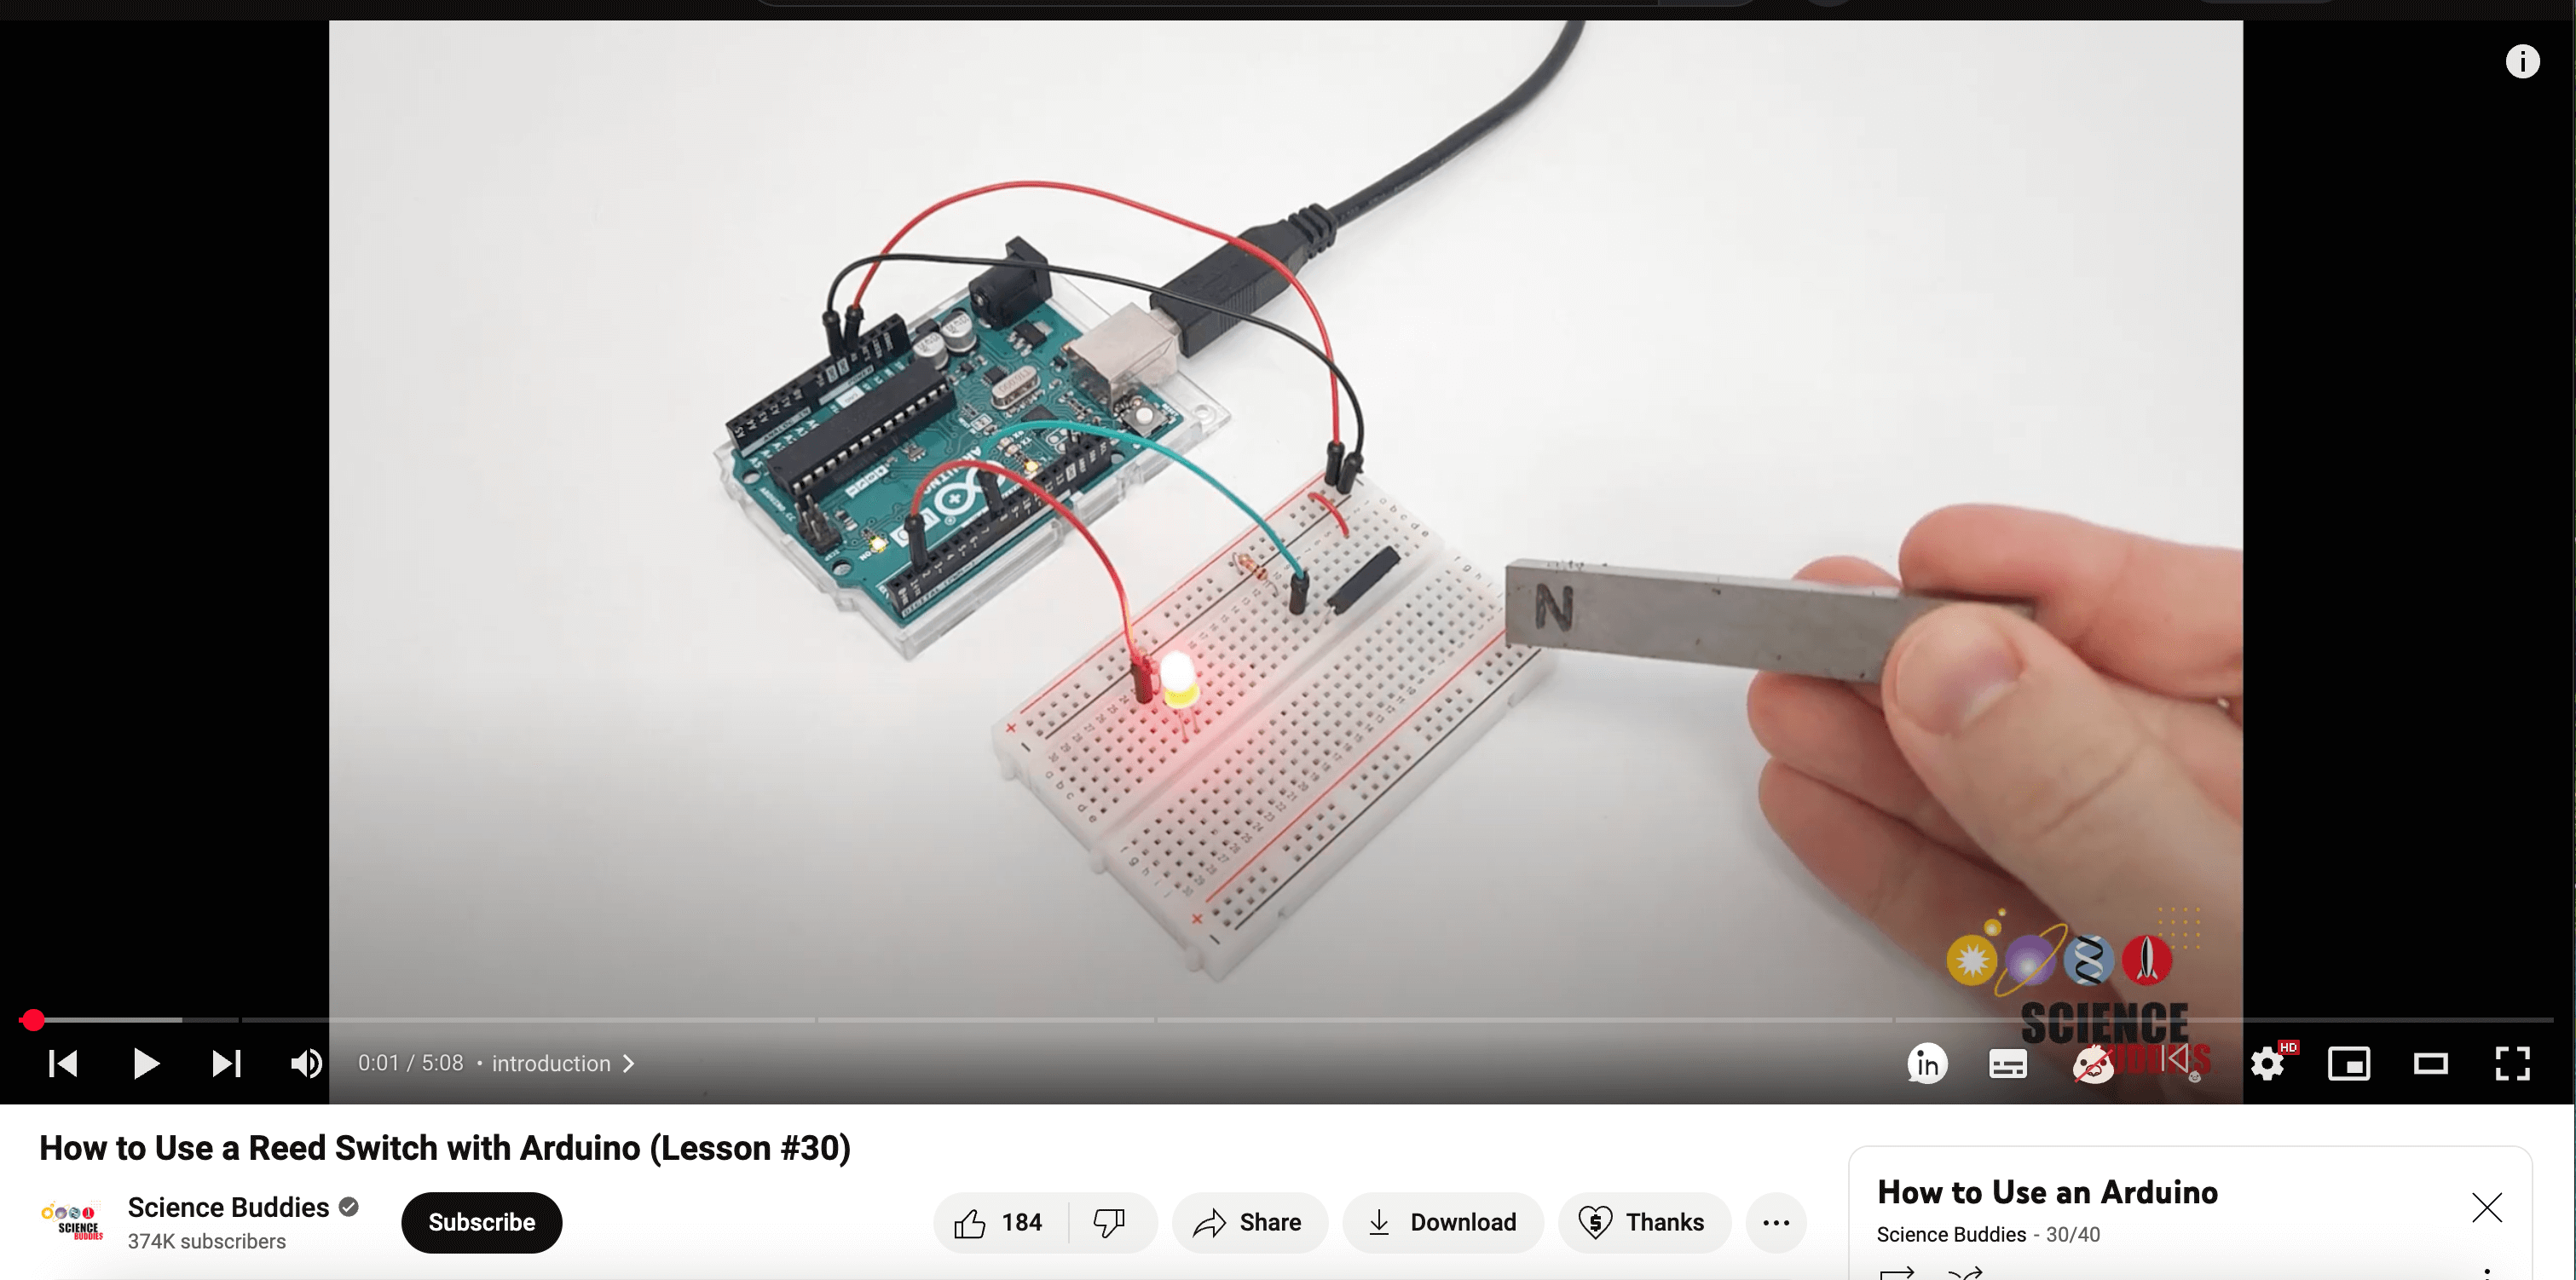
ARDUINO DEMO by Andreas
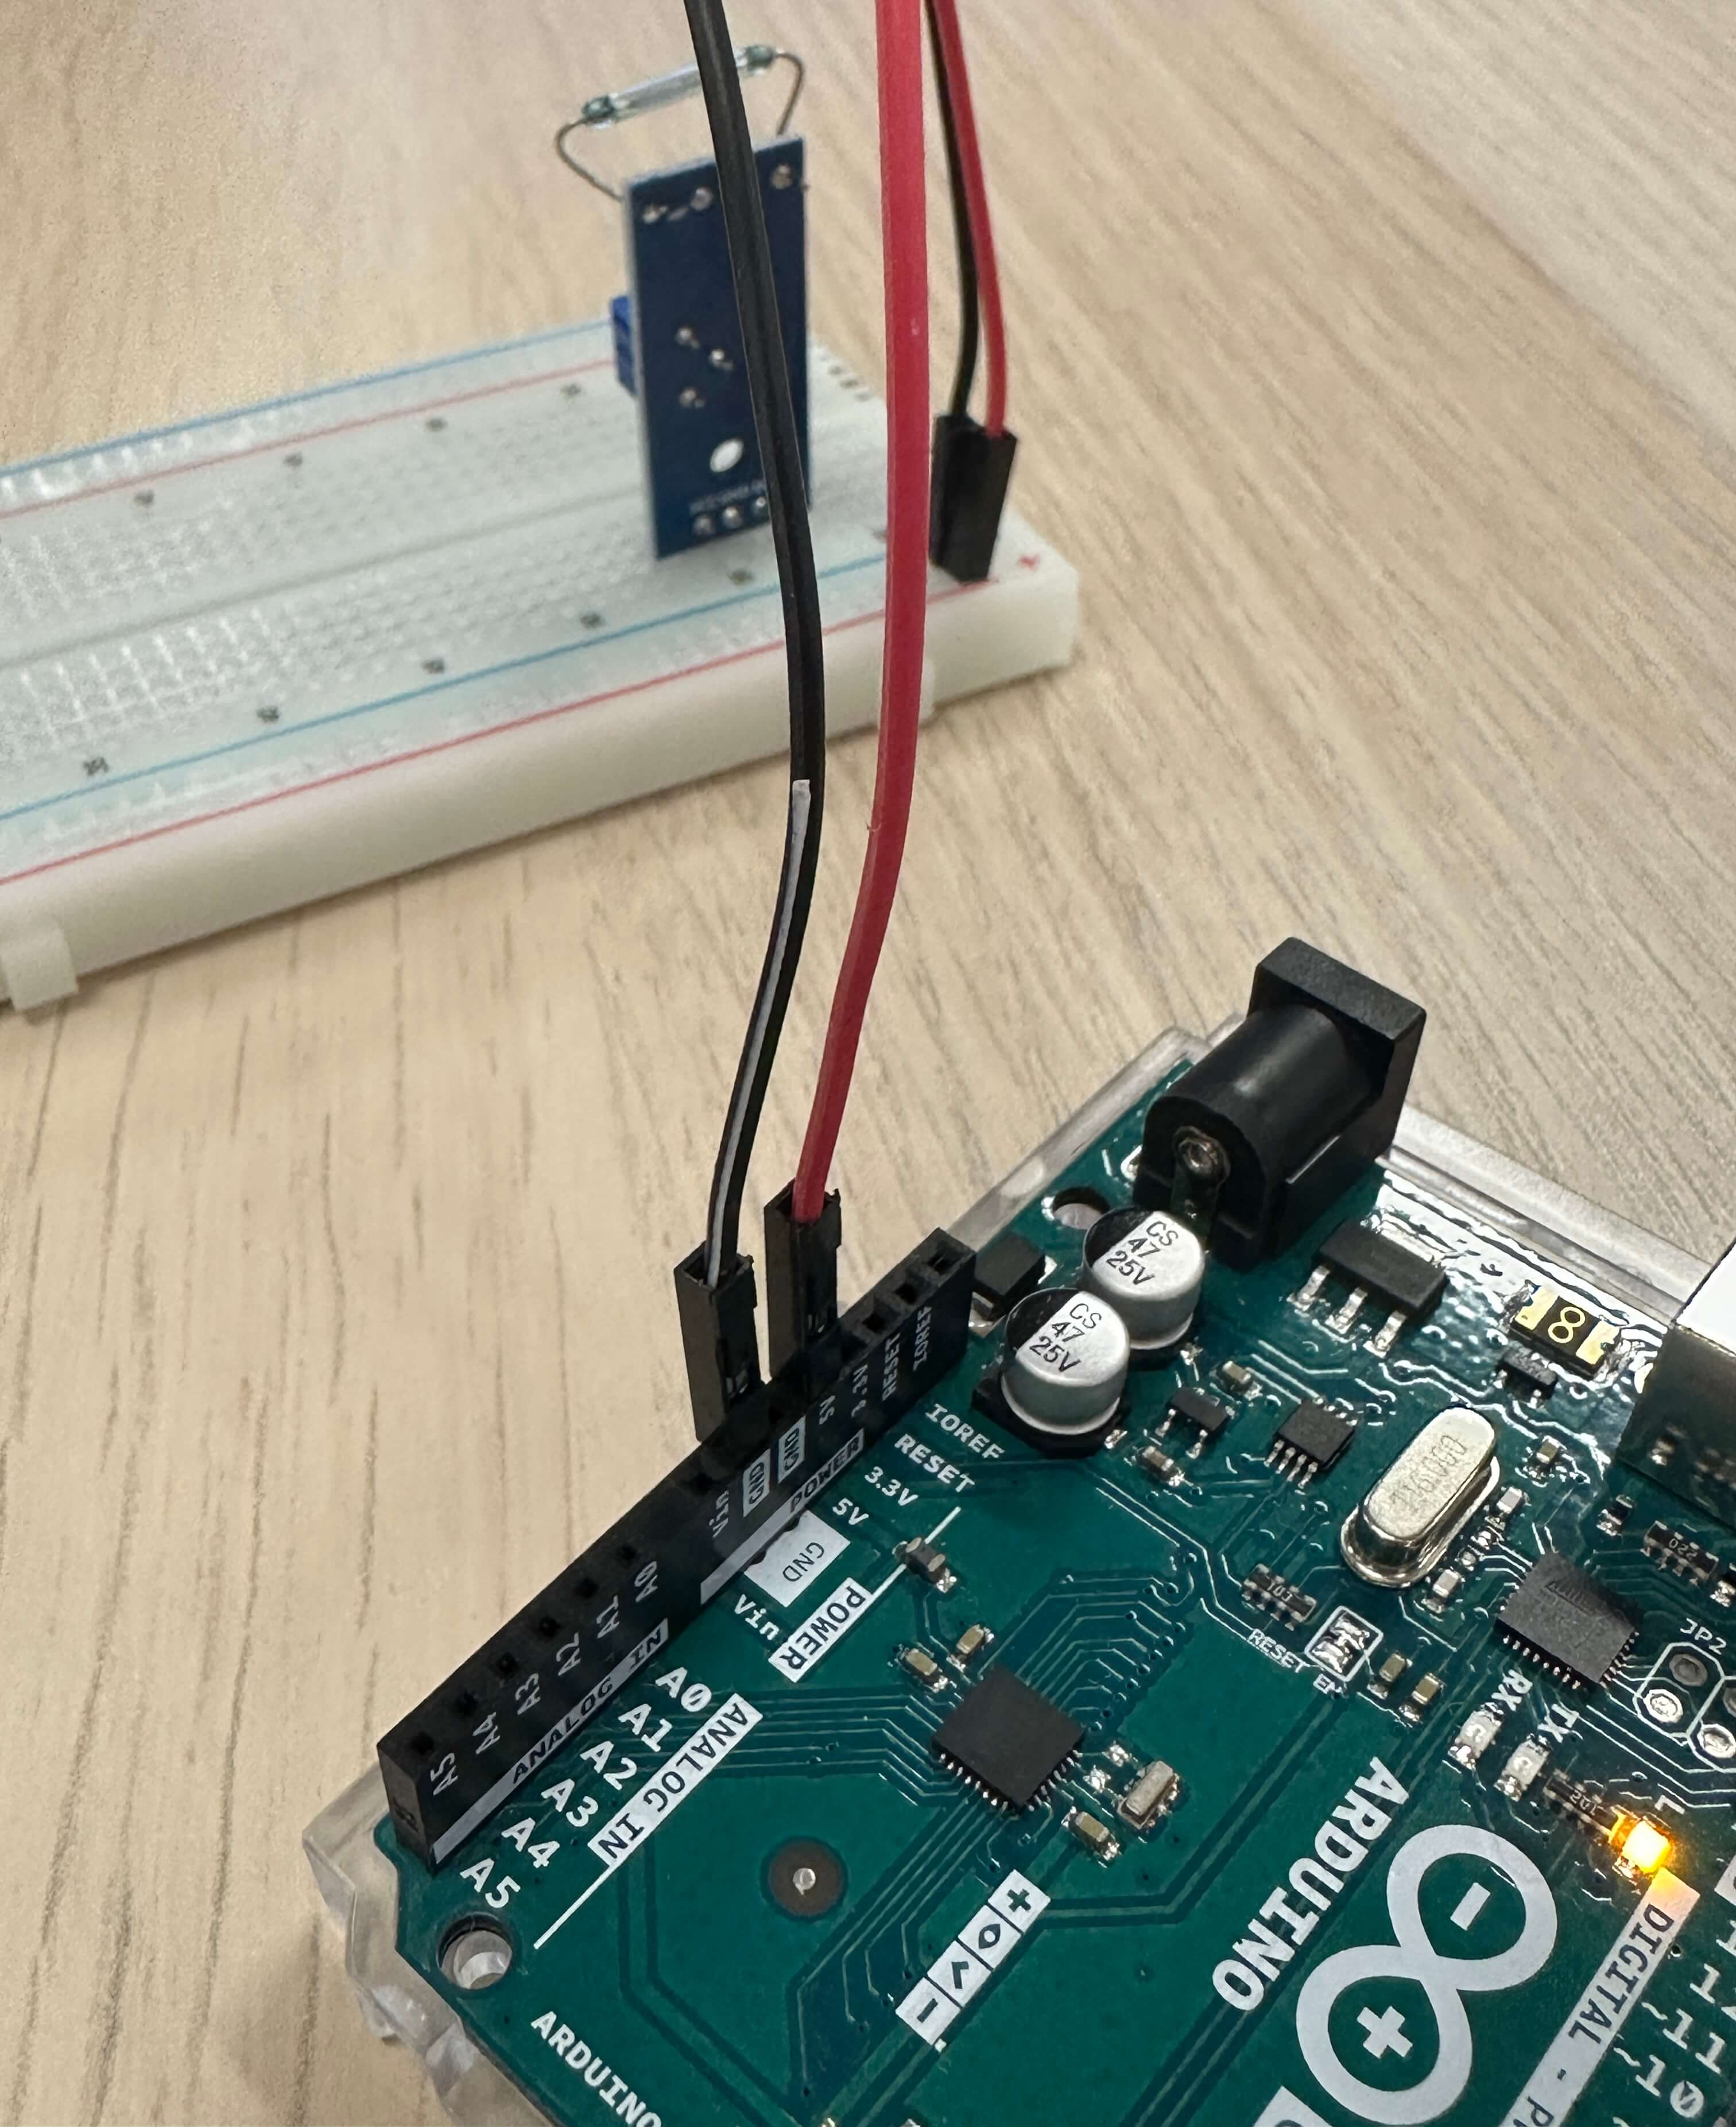
The magnet I got was too strong so it affected the magnetic current of the reed sensor. It might be better to use a smaller magnet but in order for this to work, Andreas created a hole in a sponge to slot the magnet in so that the magnet is not too close to the reed sensor. This way, the magnetic current is not too strong and the reed sensor can detect the magnet separately even though they are placed near each other. Another issue is that the magnet has to be held vertically instead of horizontally for it to work. since the surface area is smaller.
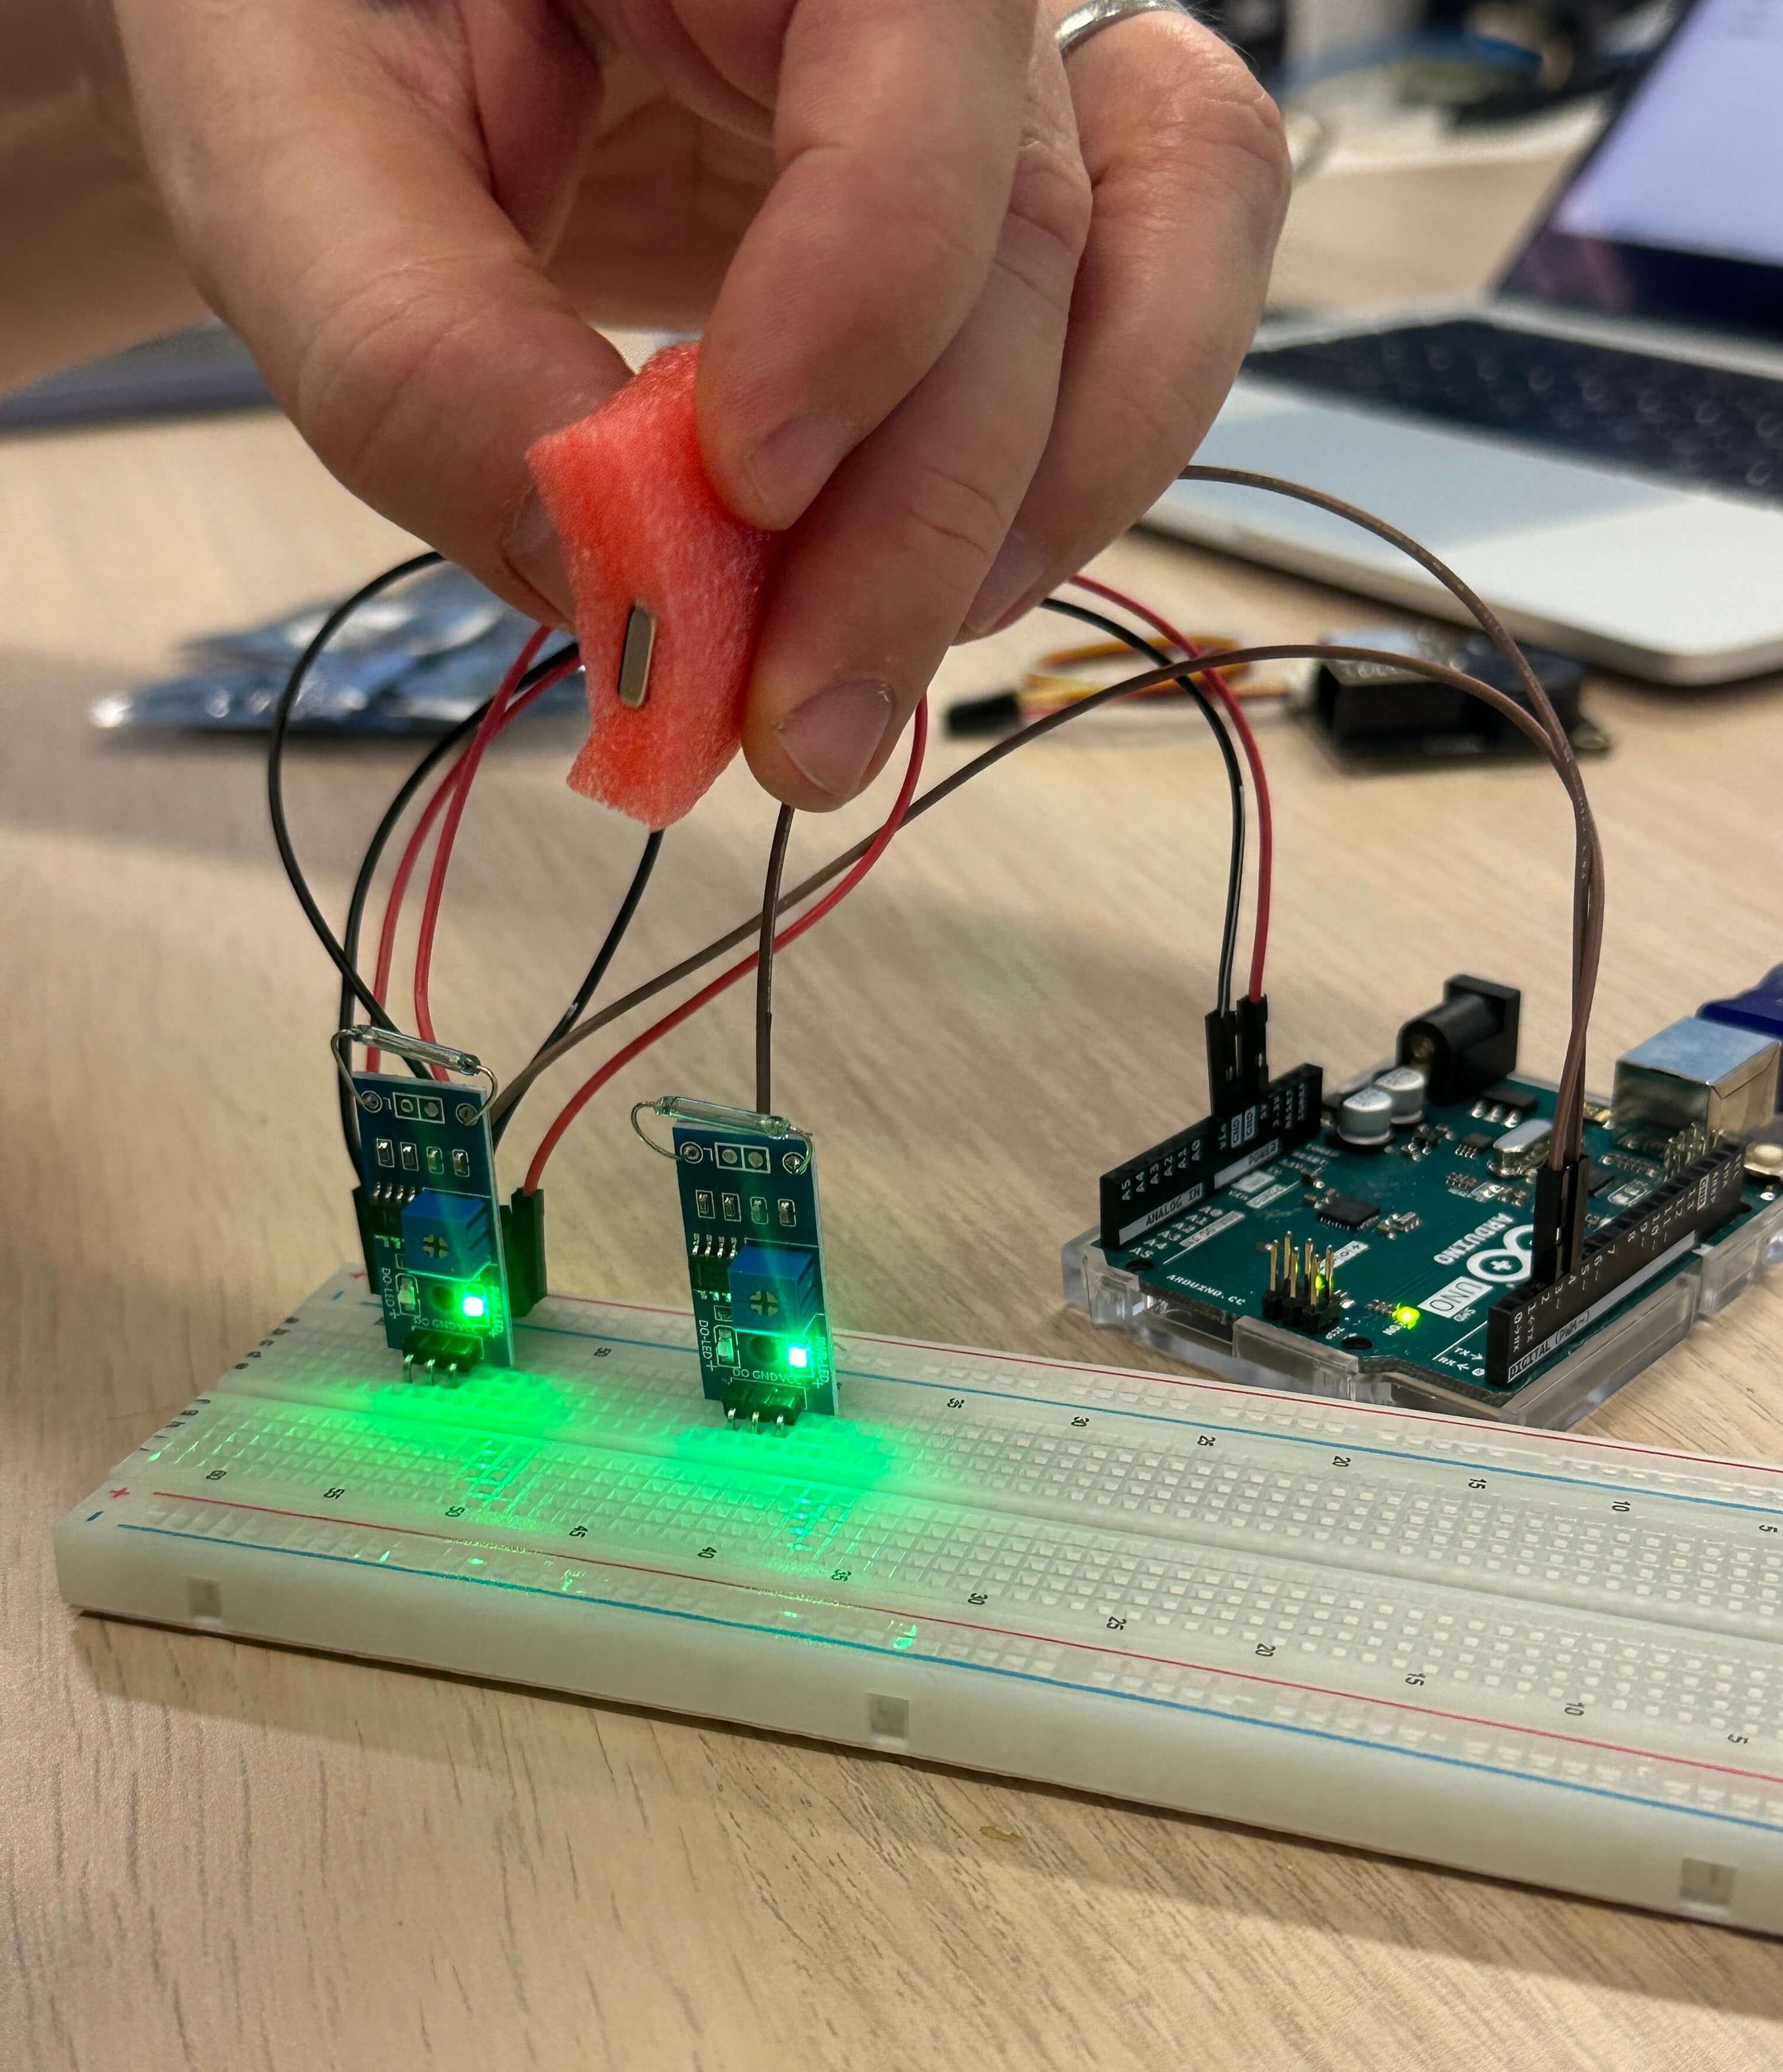
slotting magnet into a sponge to reduce magnetic current 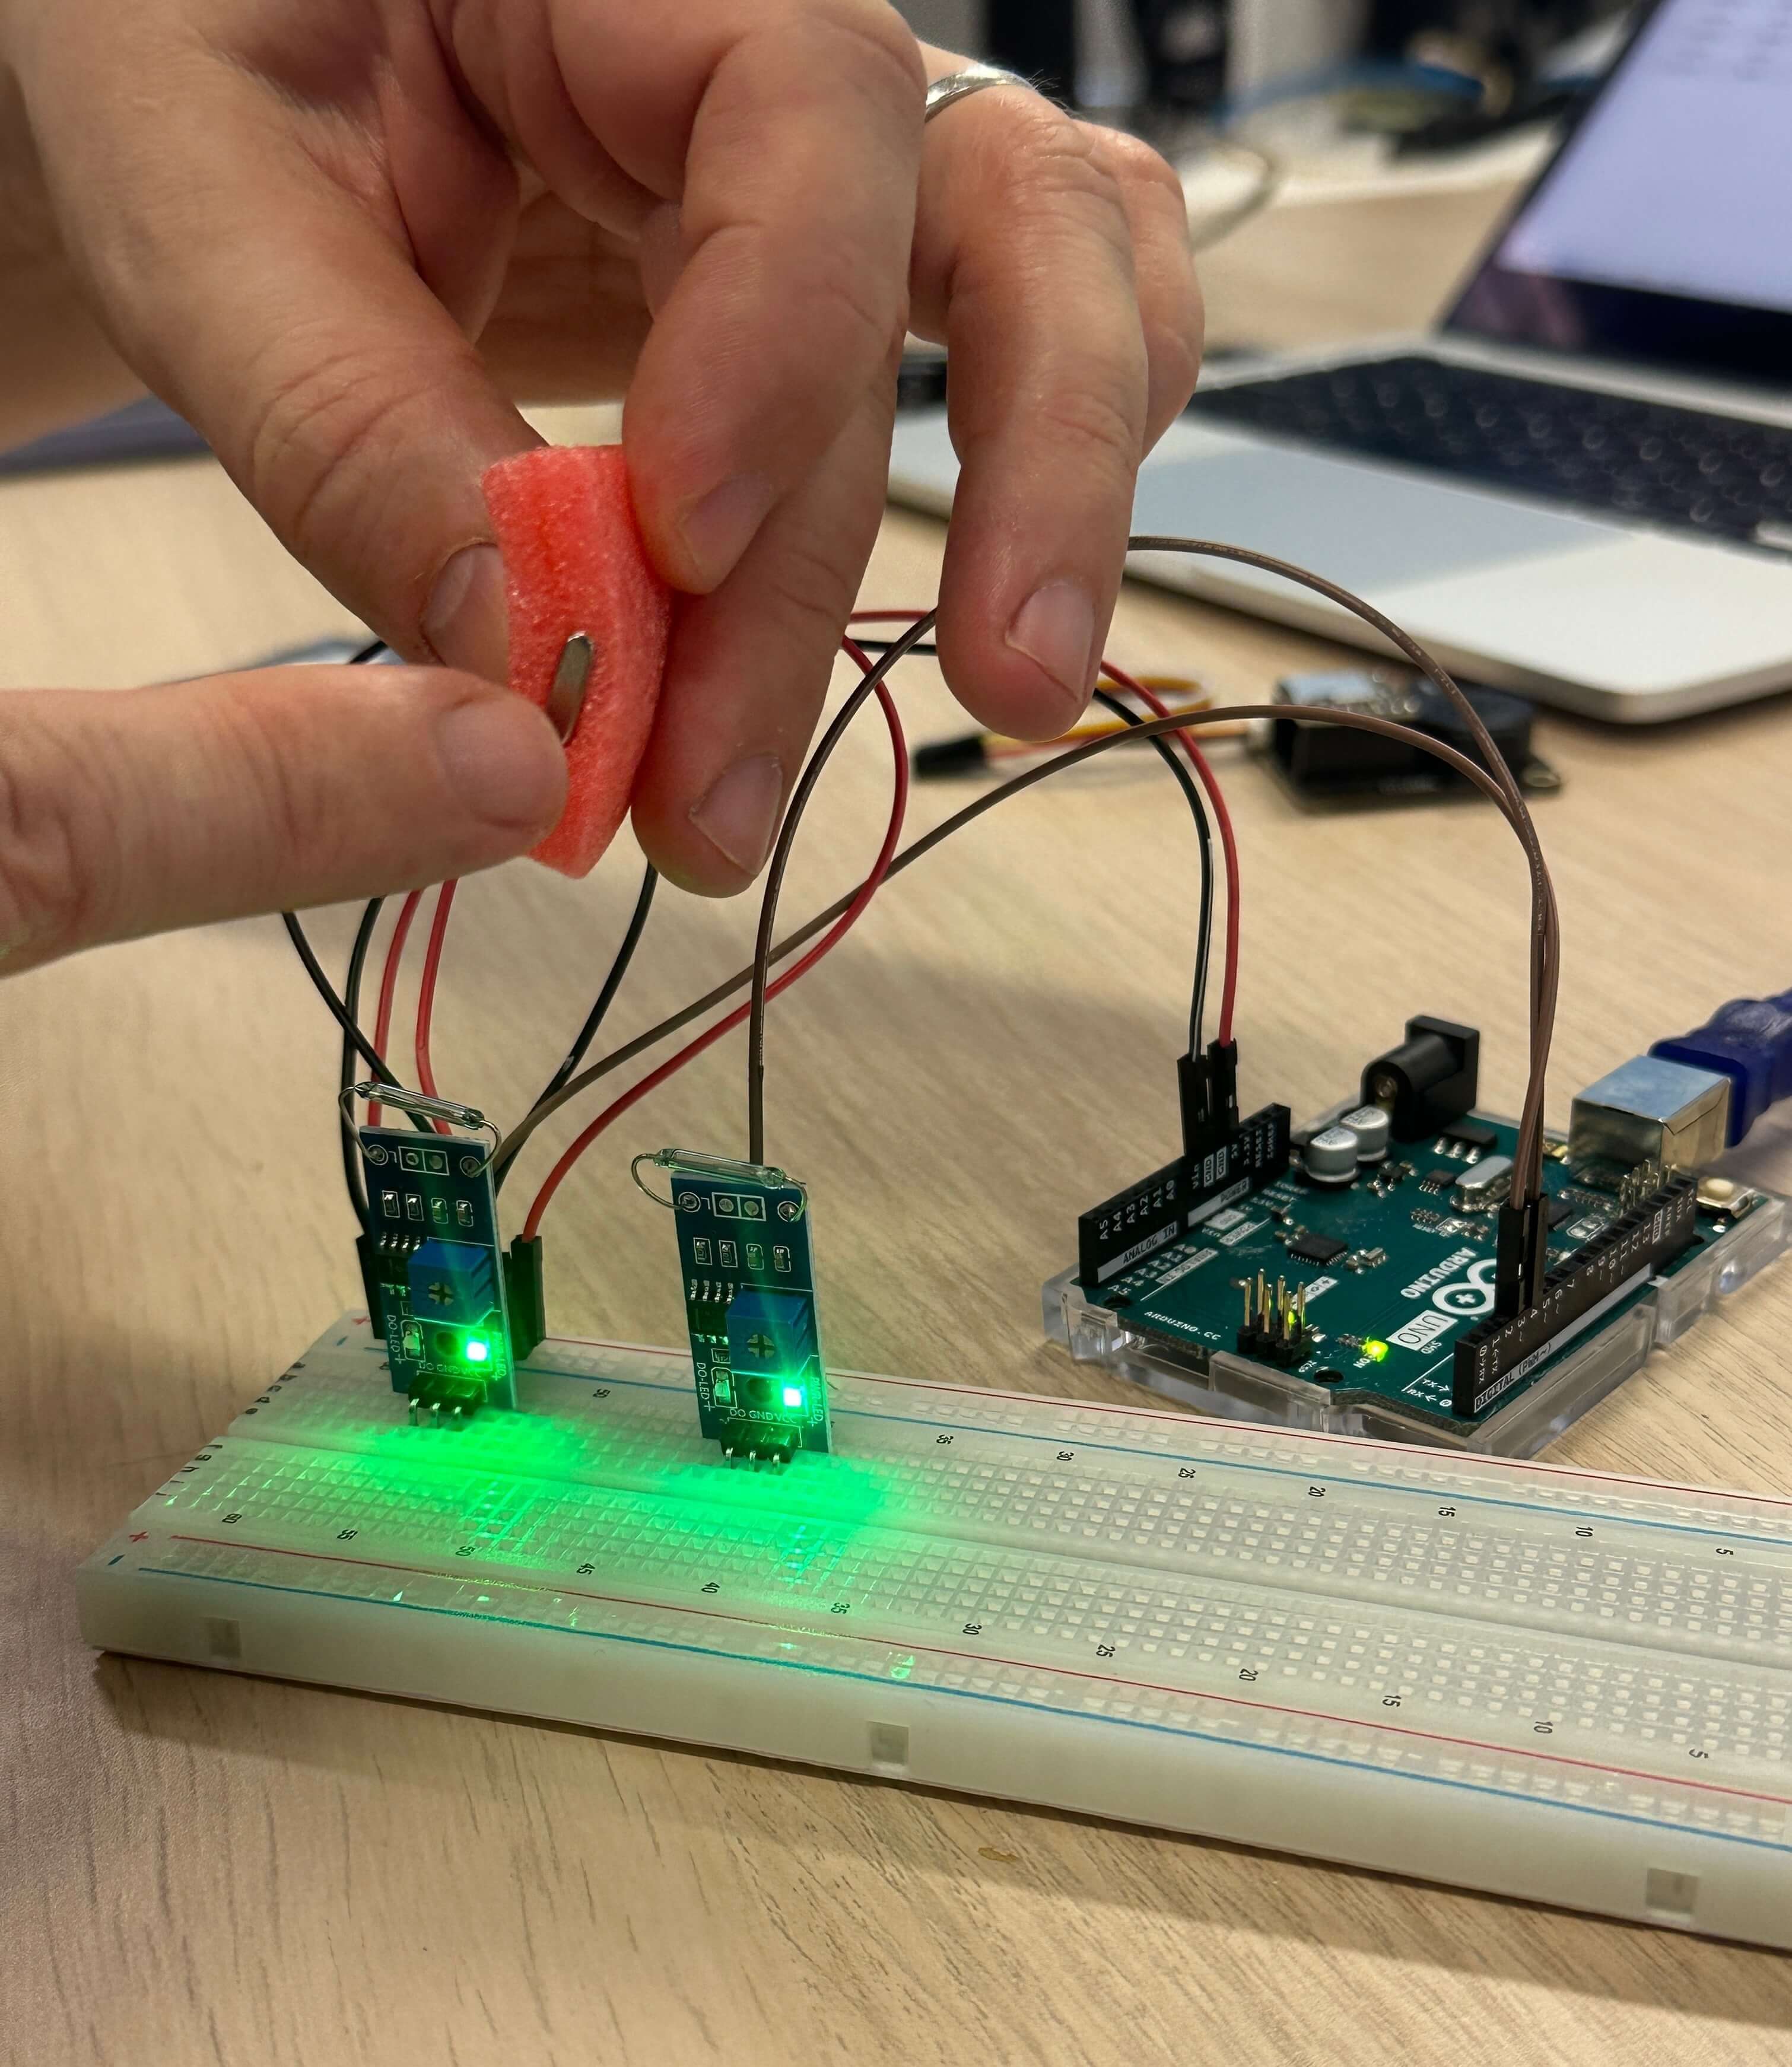
holding the magnet vertically works better as there is less magentic force 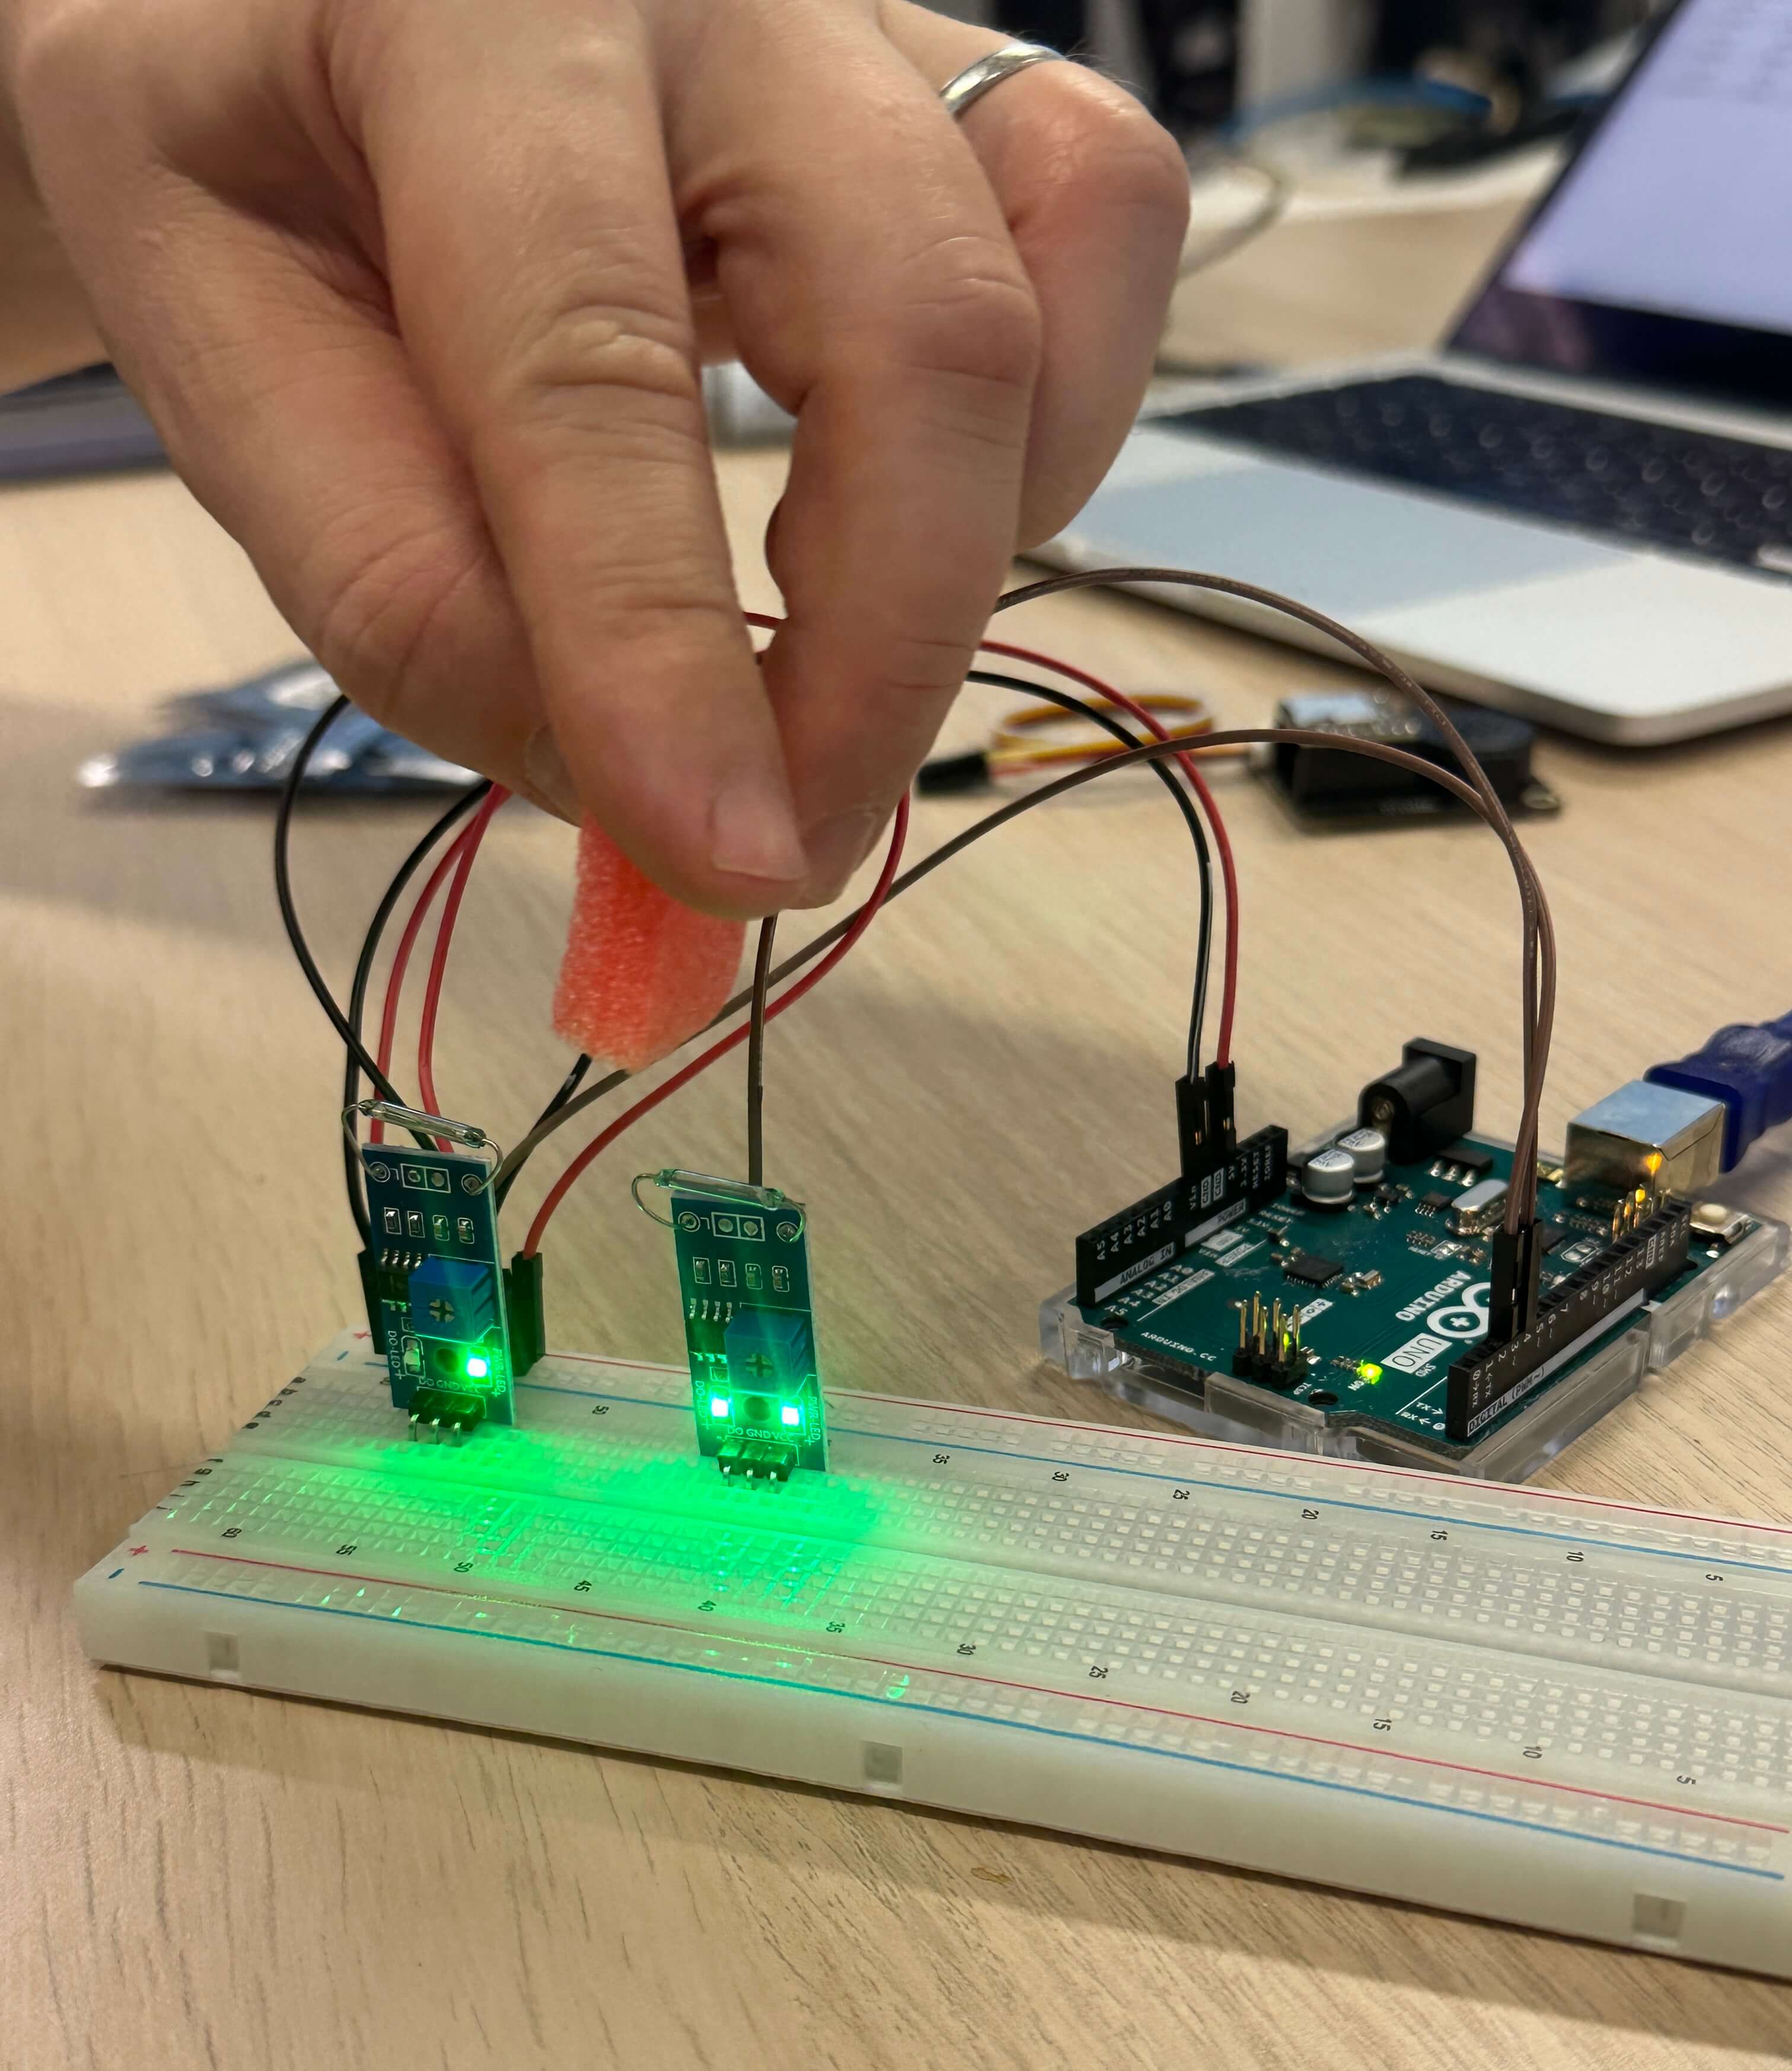
reed switches are triggered as magnet hovers above; lights up
REED SENSOR DEMO
Andreas demonstrated how to use the reed sensor with the Arduino. He showed me how to connect the reed sensor to the Arduino and how to write the code to make the reed sensor work. He also showed me how to use the serial monitor to see the output of the reed sensor. I learned only a little from the demonstration and I know I have to look up tutorials to get more confident in using the reed sensor in my project. I am quite worried because of the nearing open studios and upcoming submissions but still holding on hope as I start embarking on this second prototype.
- ✧ Get a legit Arduino UNO (GREEN)
- ✧ USB B to USB C Printer Cable
(To connect Arduino to Macbook) - ✧ Short Single Core Wires
(For neater wire management)
PROBLEMS FACED
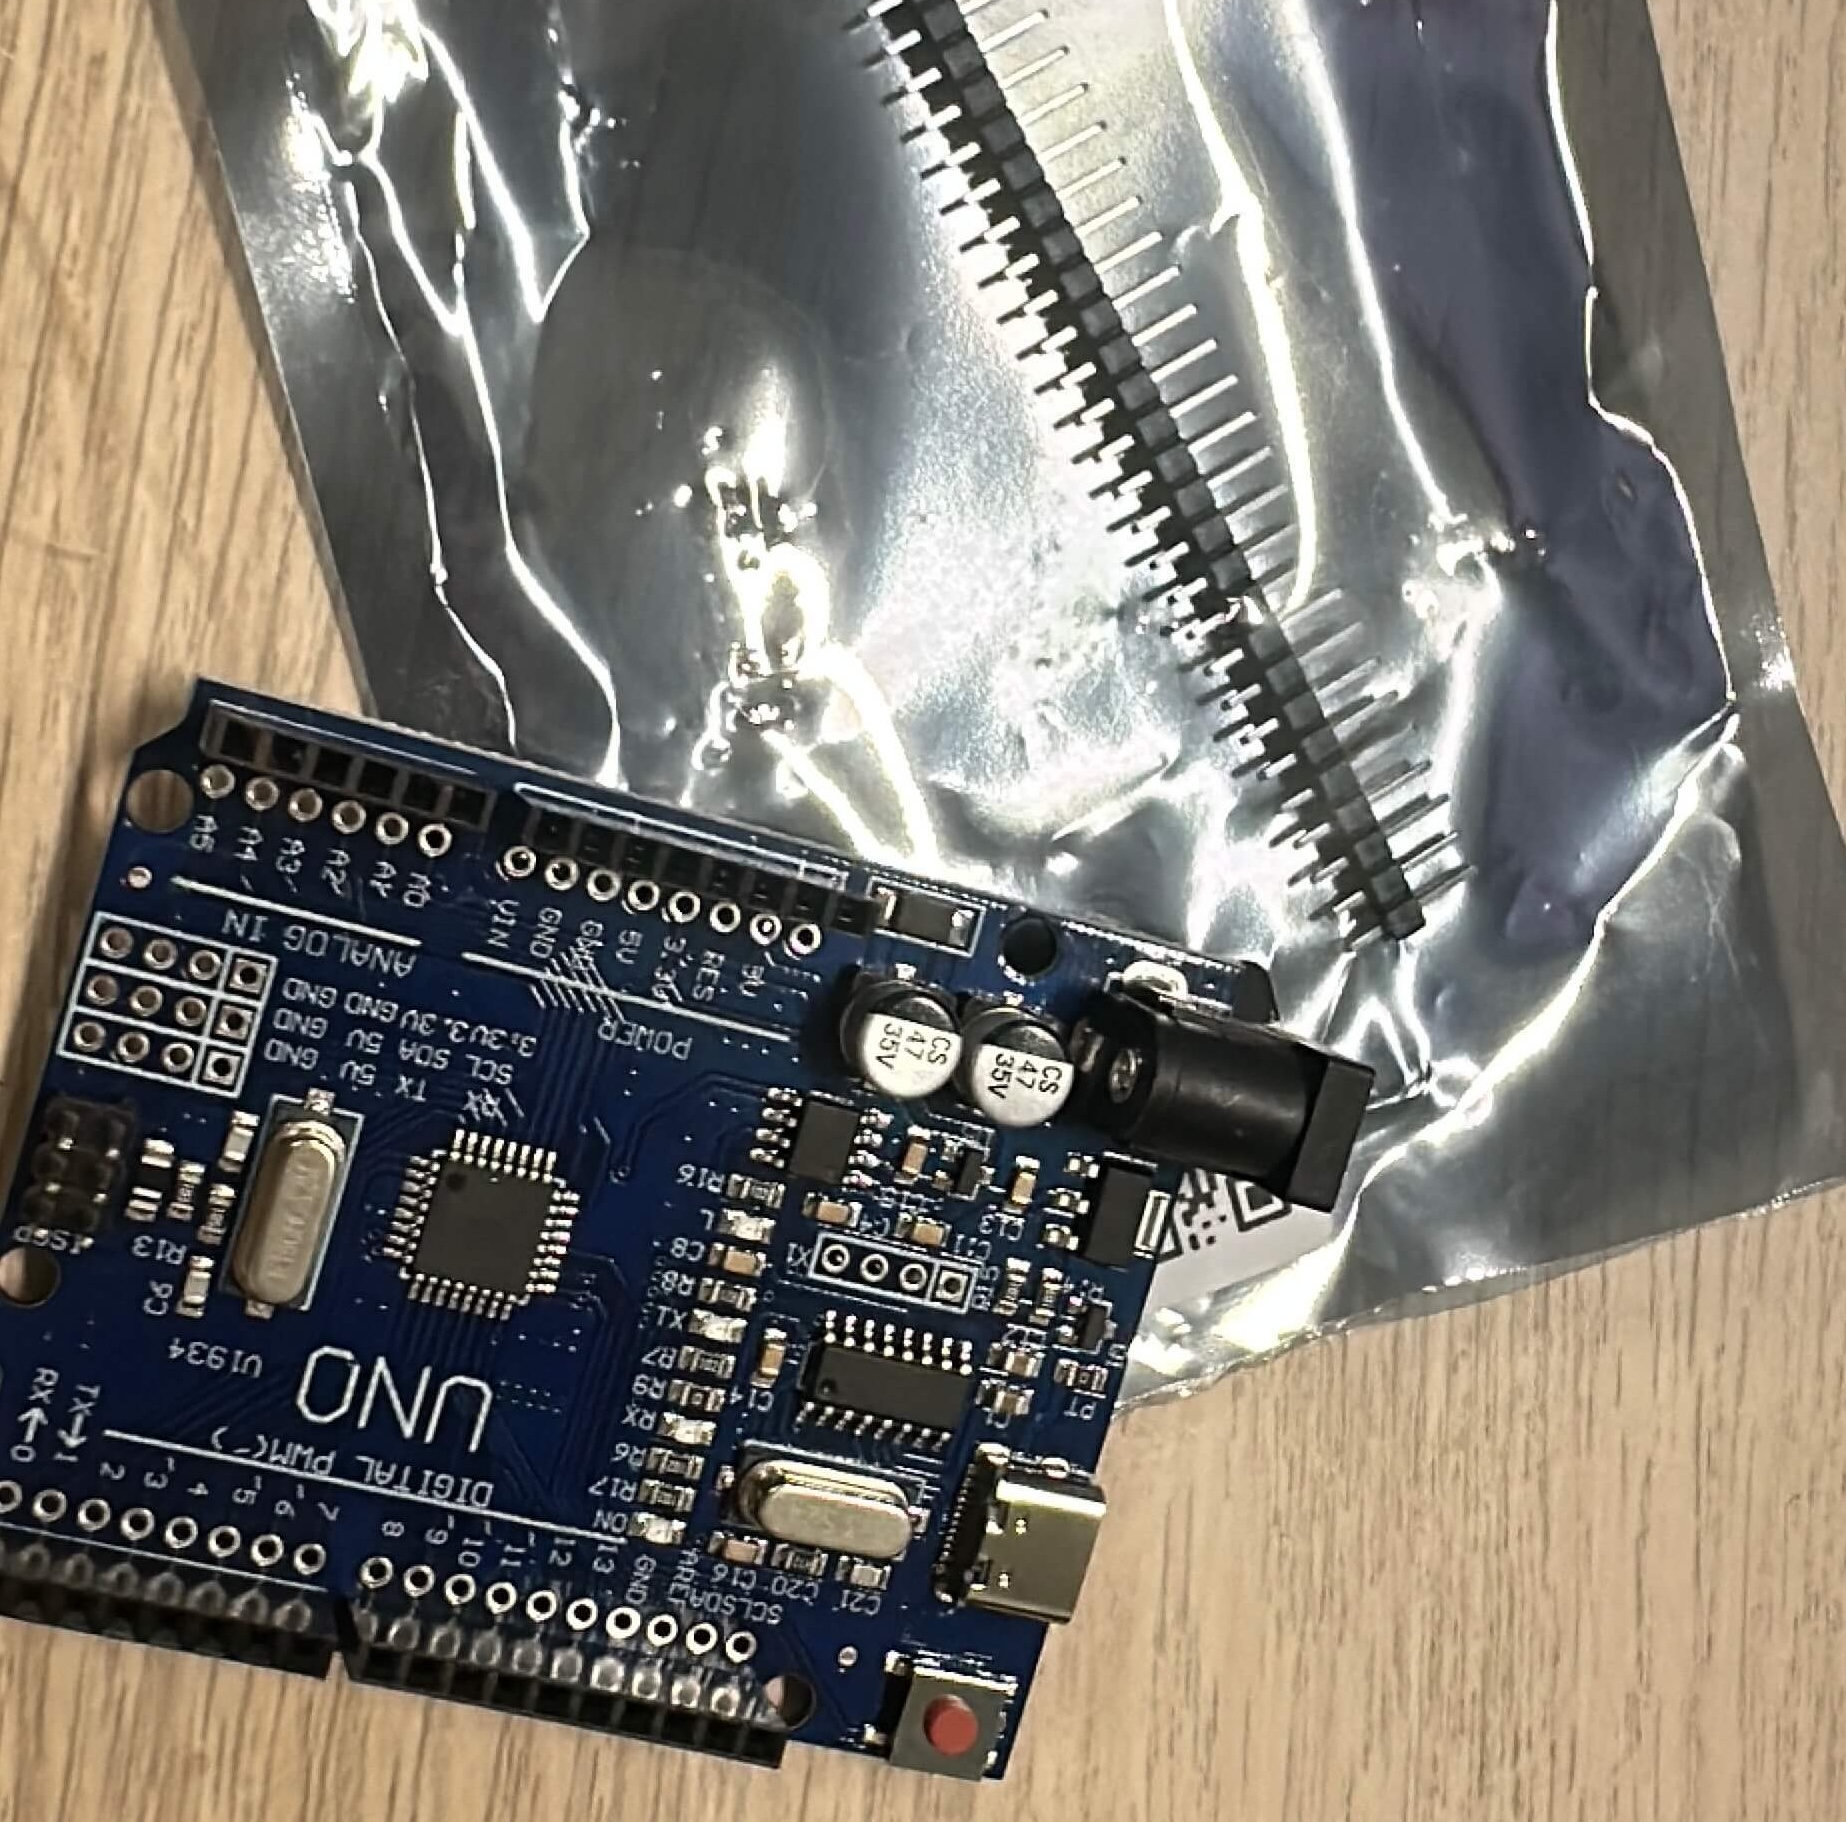
The very initial problem I faced was the arduino board that I didn't know was a counterfeit product and after trying out 3 usb c to usb c wires we concluded that it was 'faulty'. I went to visit the shop the next day and realised it wasn't faulty even though it was a counterfeit product, we were just using the wrong wire. However, I still decided to not risk it and play it safe by changing it to a legitimate Arduino UNO (GREEN) and purchased a USB B to USB C Printer Cable to connect the Arduino to my Macbook.
The other problem I faced was the long wires that I had to manage if I had to use many of them the setup will look really messy and complicated. Andreas used the resistors to replace the jumper wires that day because I only had jumper wires with me but it was just a temporary solution as this way the wires are exposed and its more prone to a short circuit.
Andreas suggested me to get single core wires for neater wire management since it can be cut to the desired length and it is easier to manage.
"faulty" arduino 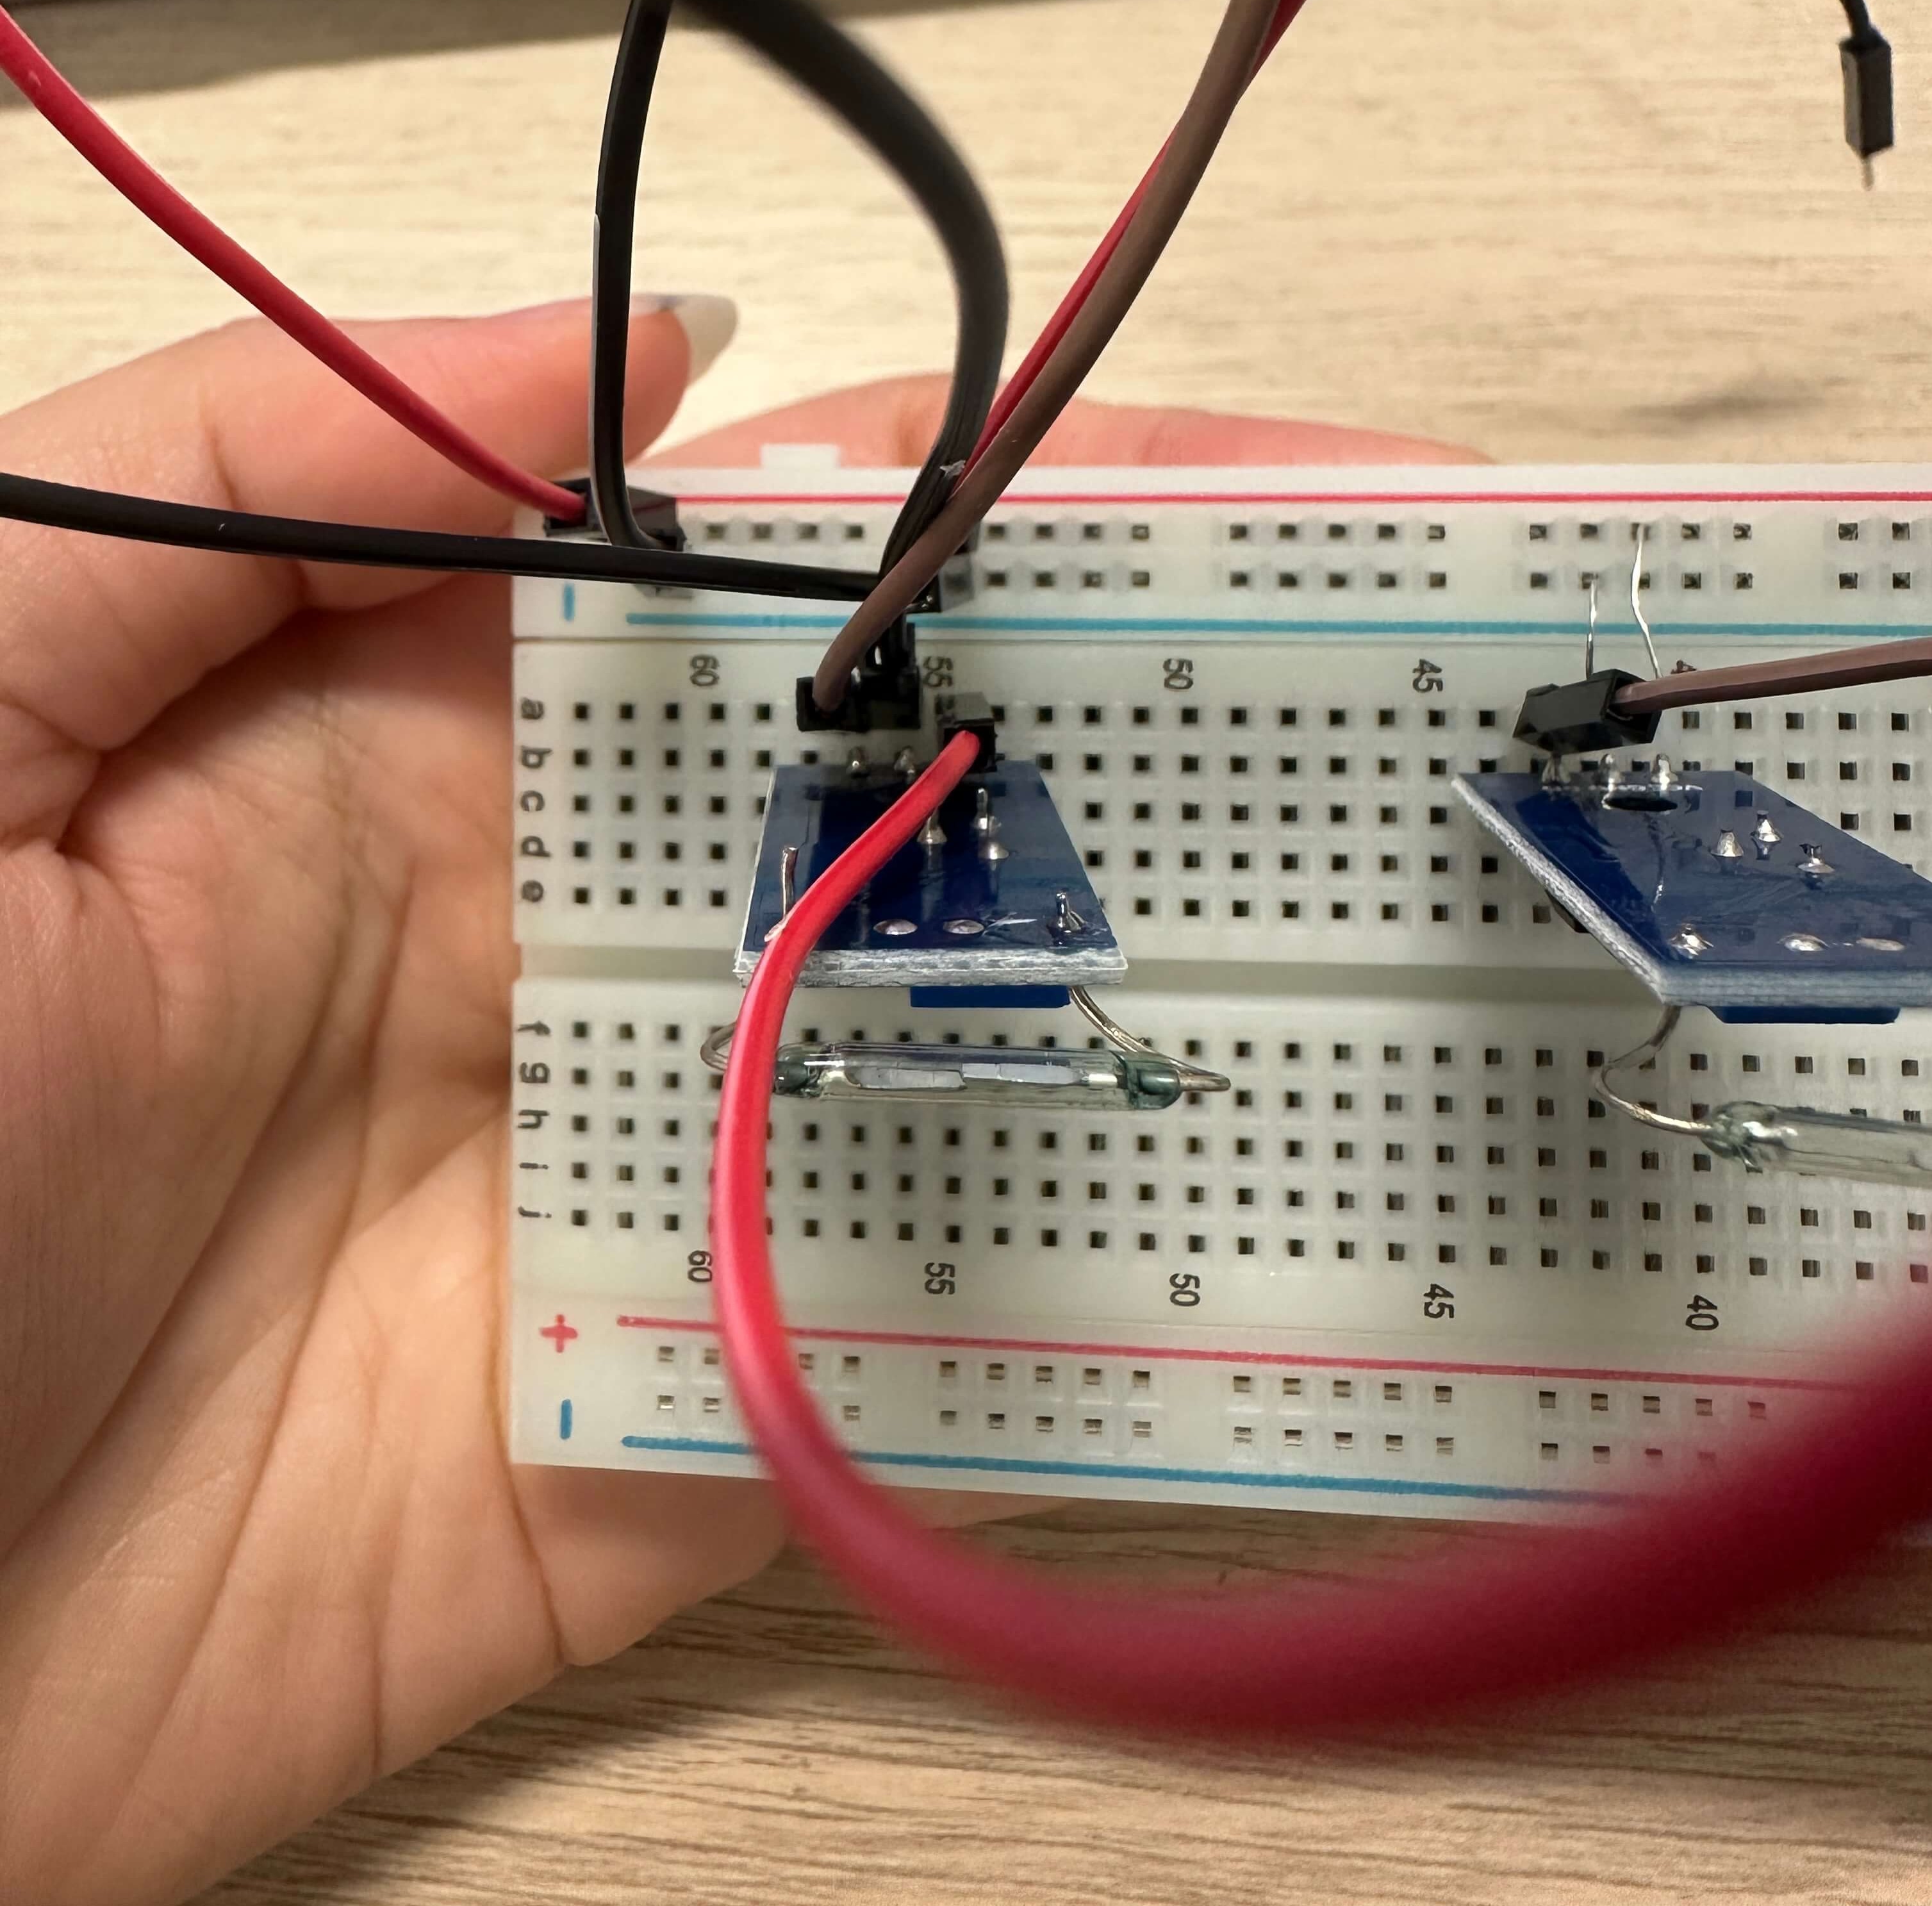
be cautious of short circuit
(the 2 exposed metal wires)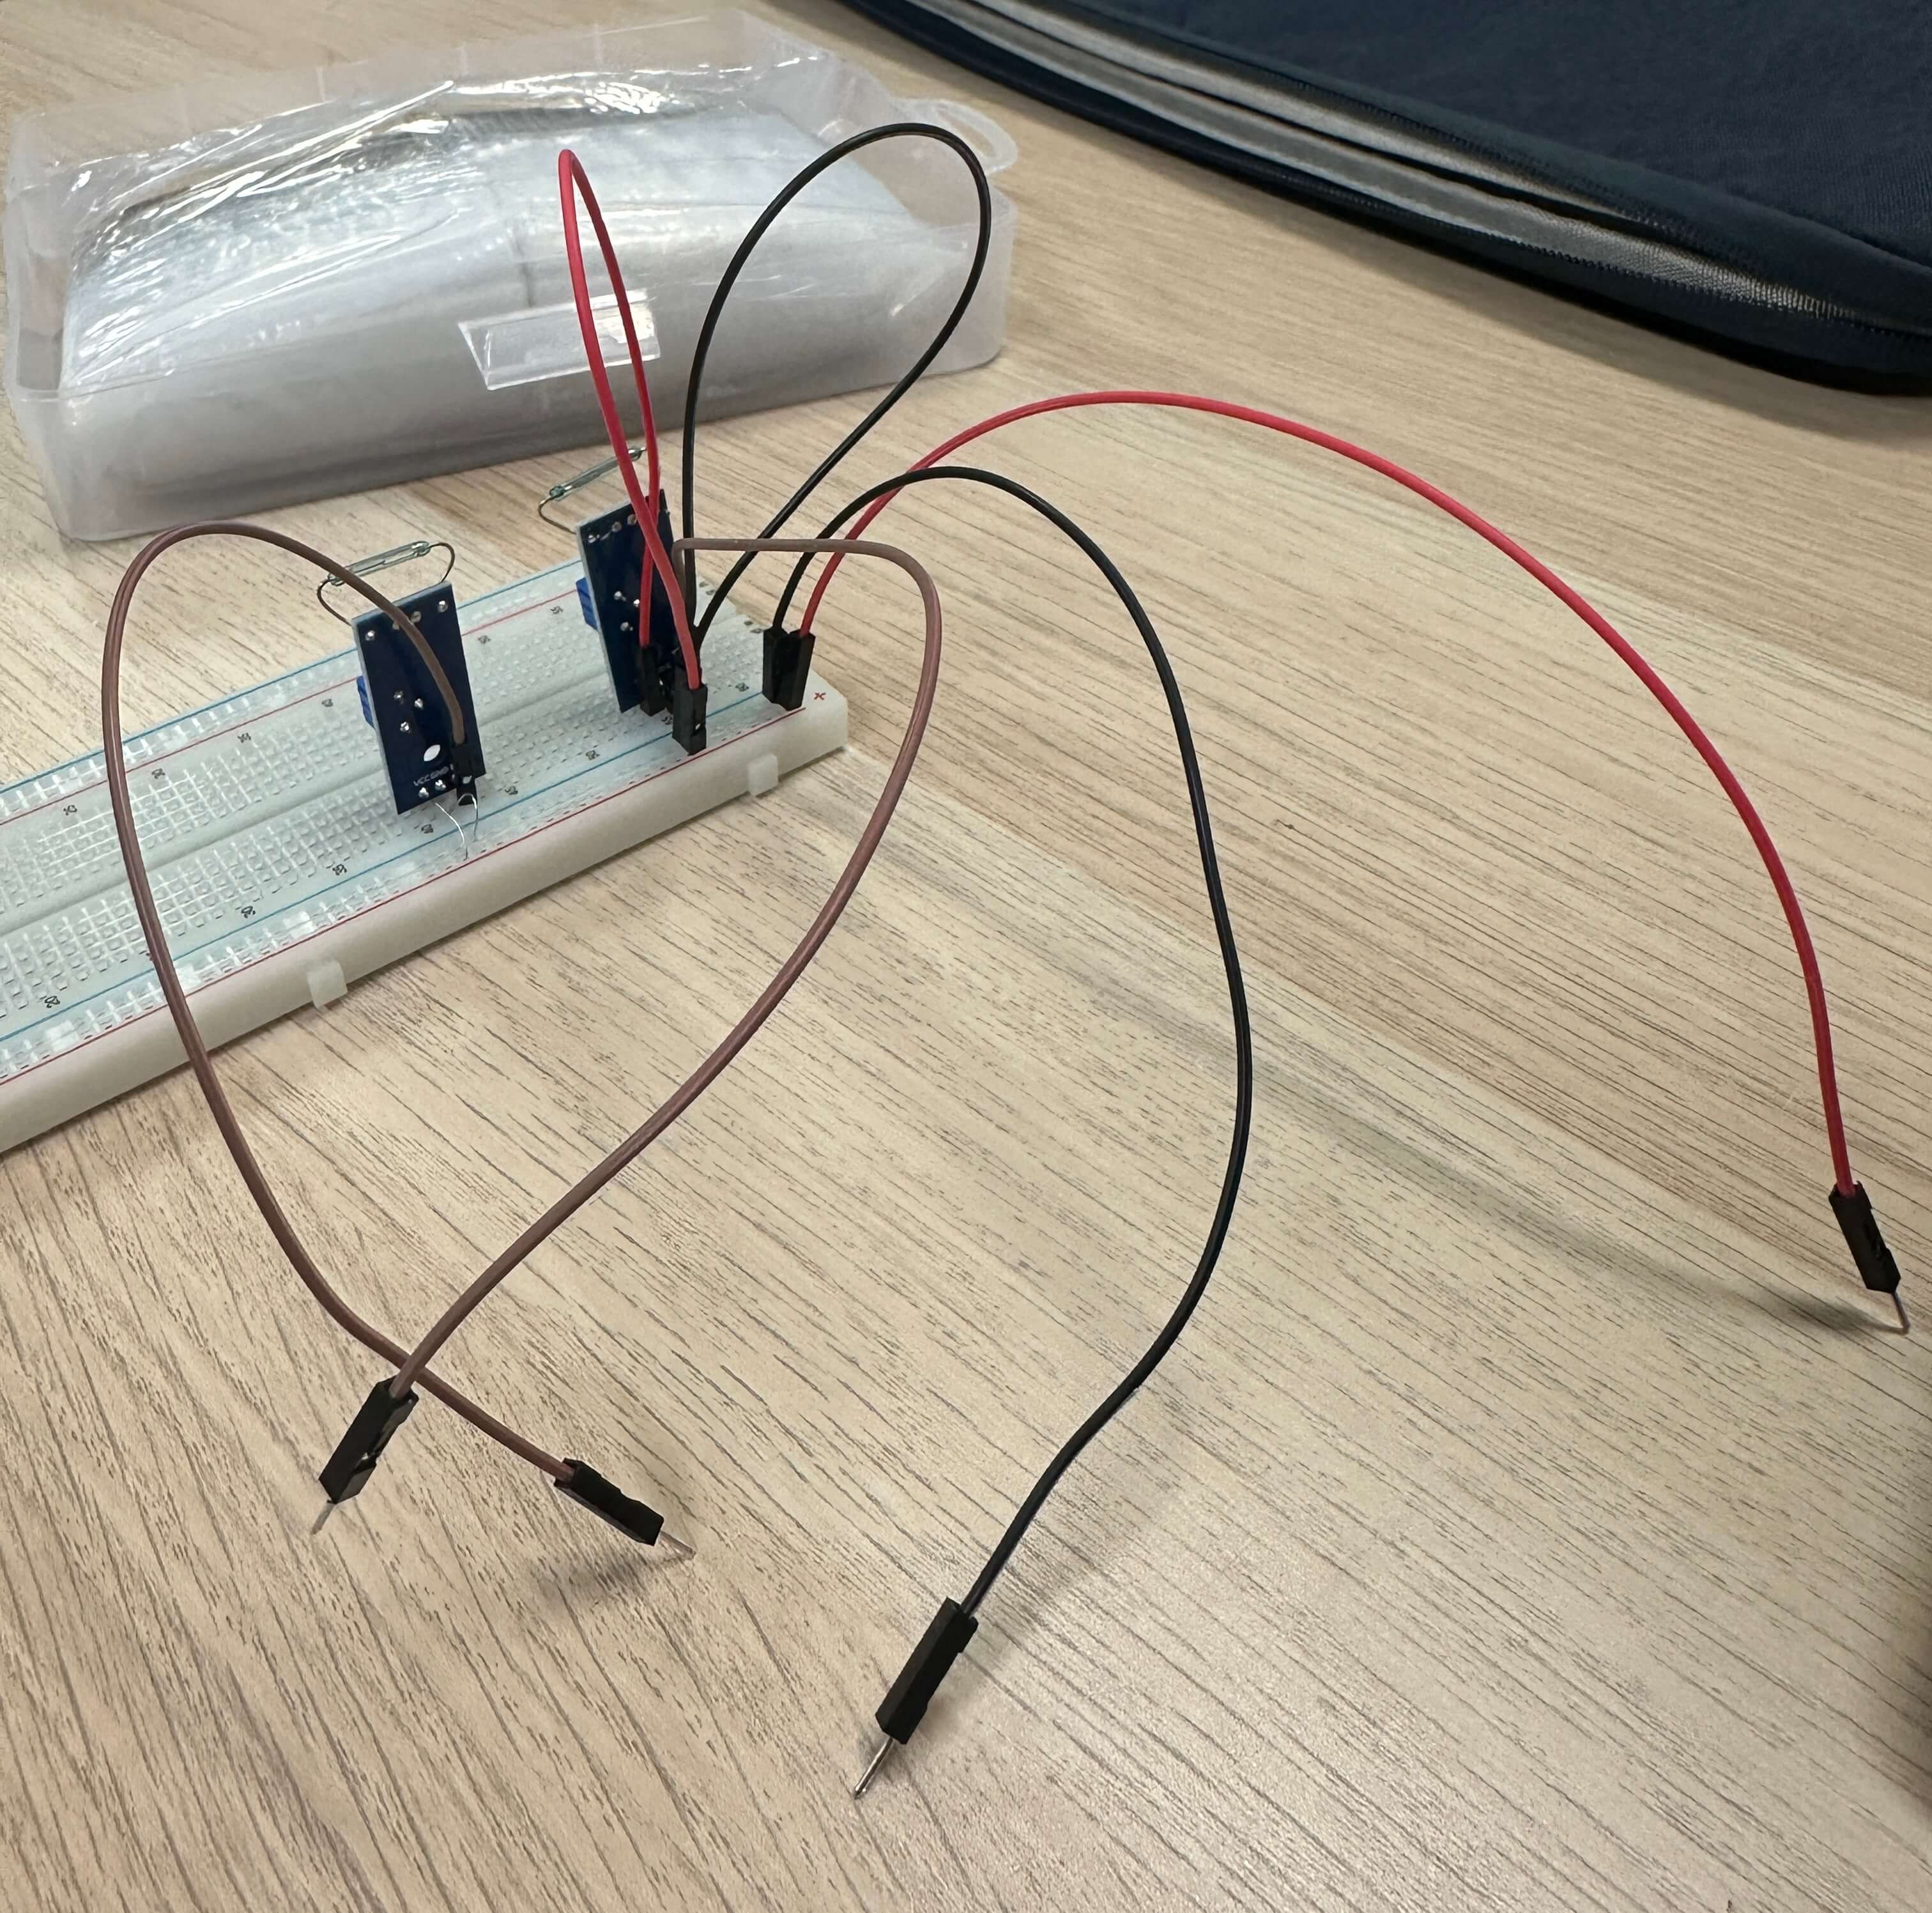
already messy wiring situation
with just 2 reed sensors
PURCHASING Tools (TUES)

Arduino Uno R3 Model 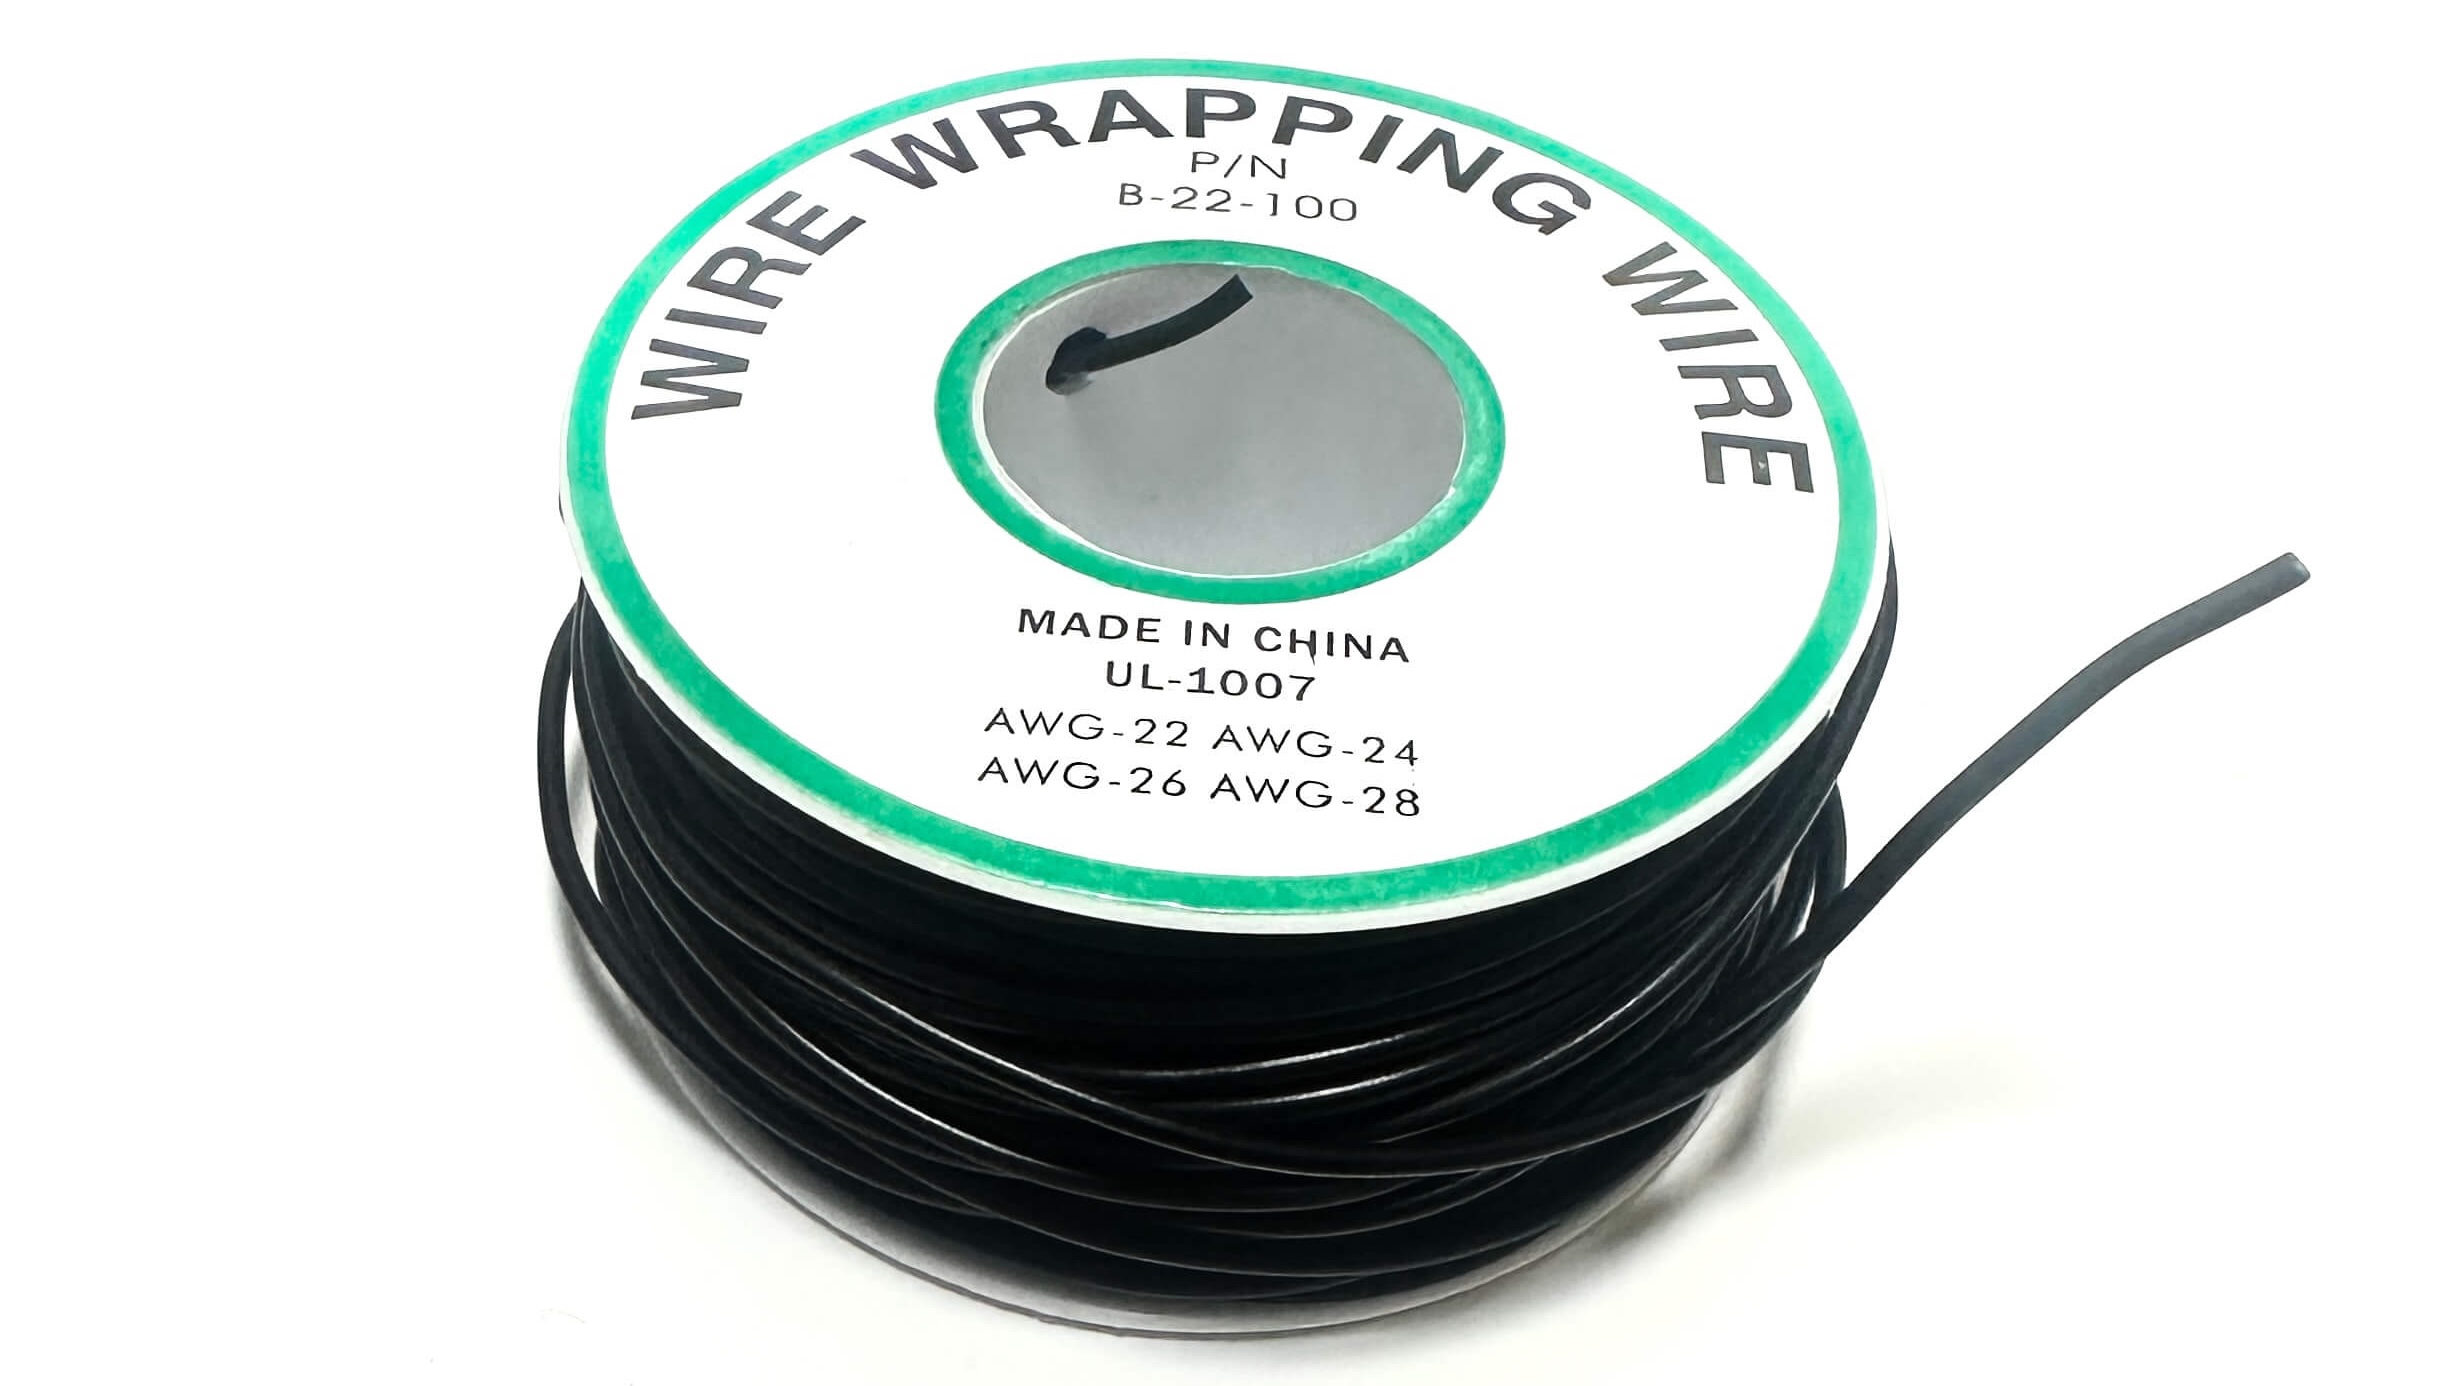
Black Single Core Wire 
USB to Printer Cable (with an adapter)
ARDUINO UNO (TUES)
Even though Andreas taught me the very basics that day, it was my first time learning so I couldn't remember everything. Hence, I searched up and watched a few tutorials to really understand and figure out how to connect the reed switch to an arduino board. Although I was elated that I managed to connect them correctly myself while following through the tutorials, I was still worried as most of them didn't have the exact steps I was looking for. I wanted to have 9 reed switches on the breadboard but most tutorials only had 1 or 2 reed switches.
- ✧ 9 reed switches on the breadboard
- ✧ reed switches & audio playback code
- ✧ 'invisible map' prototype materials
led light and arduino
the main problem now is that only one reed sensor managed to light up
CPJ - LIGHTBOX FEATURE (THURS)
Black Single Core Wire 
Arduino Uno R3 Model
Black Single Core Wire
TABLE SET-UP BRIEFING (THURS)
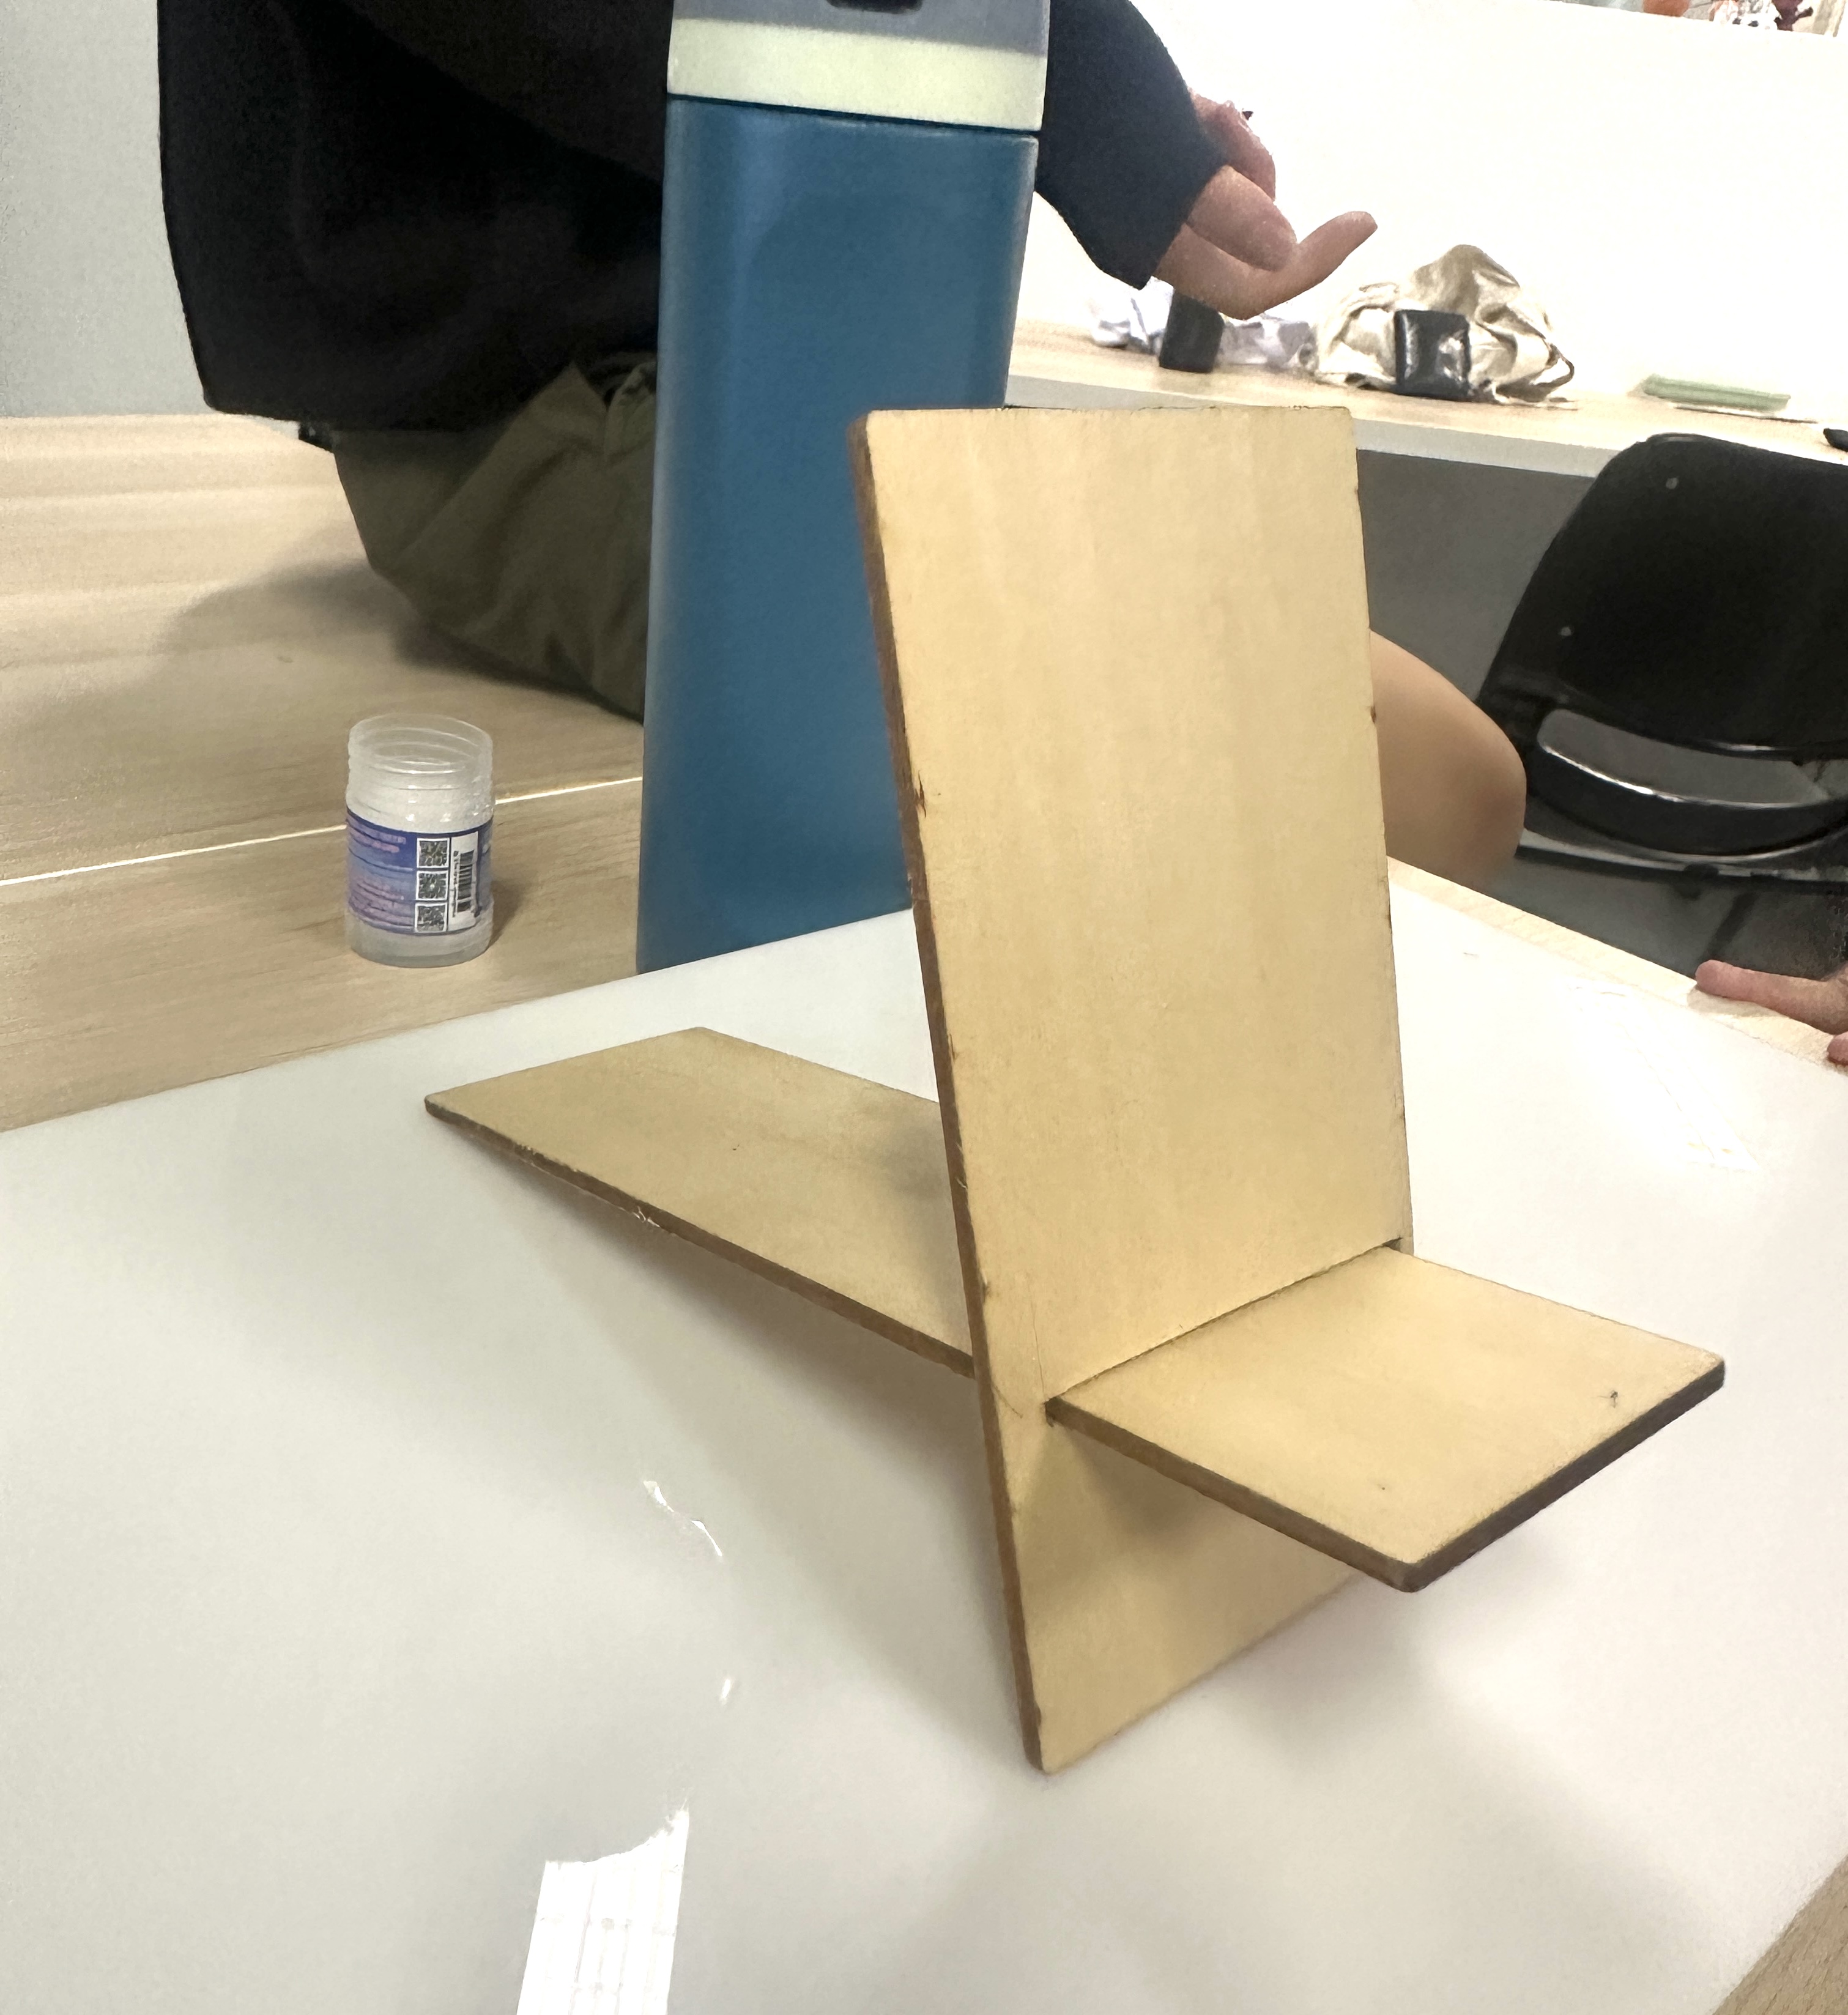
one method to display a small booklet (lasercut wood) 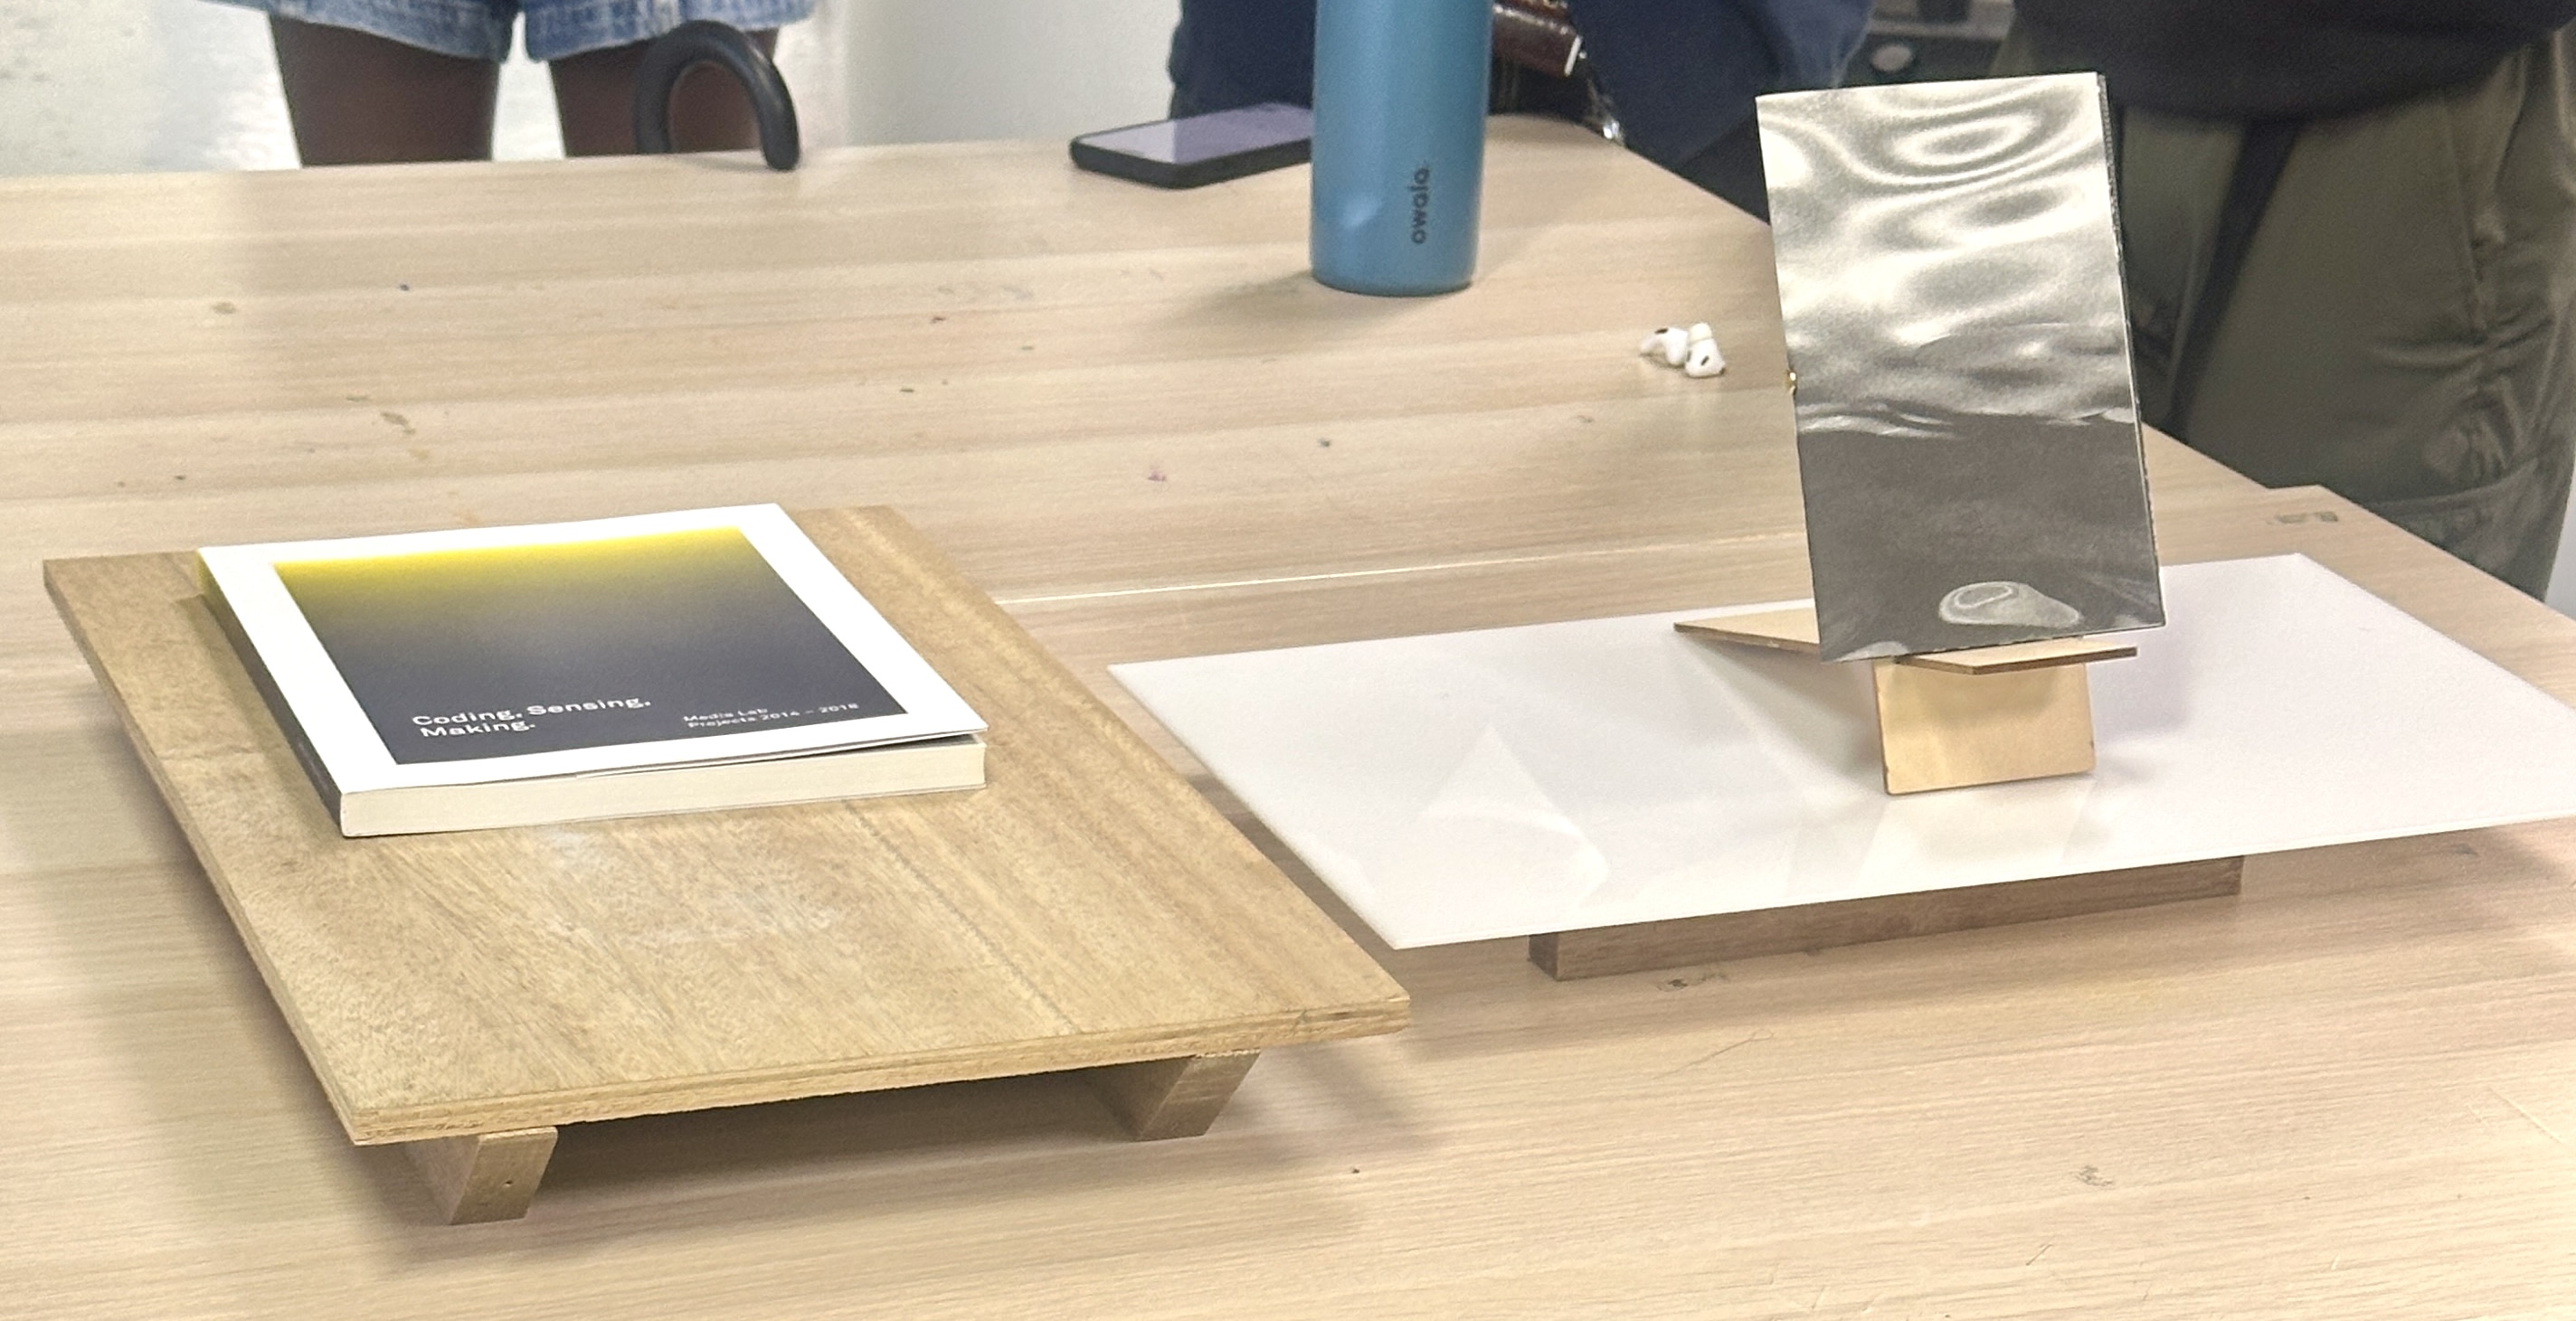
I am thinking of adapting this method to display my boxes
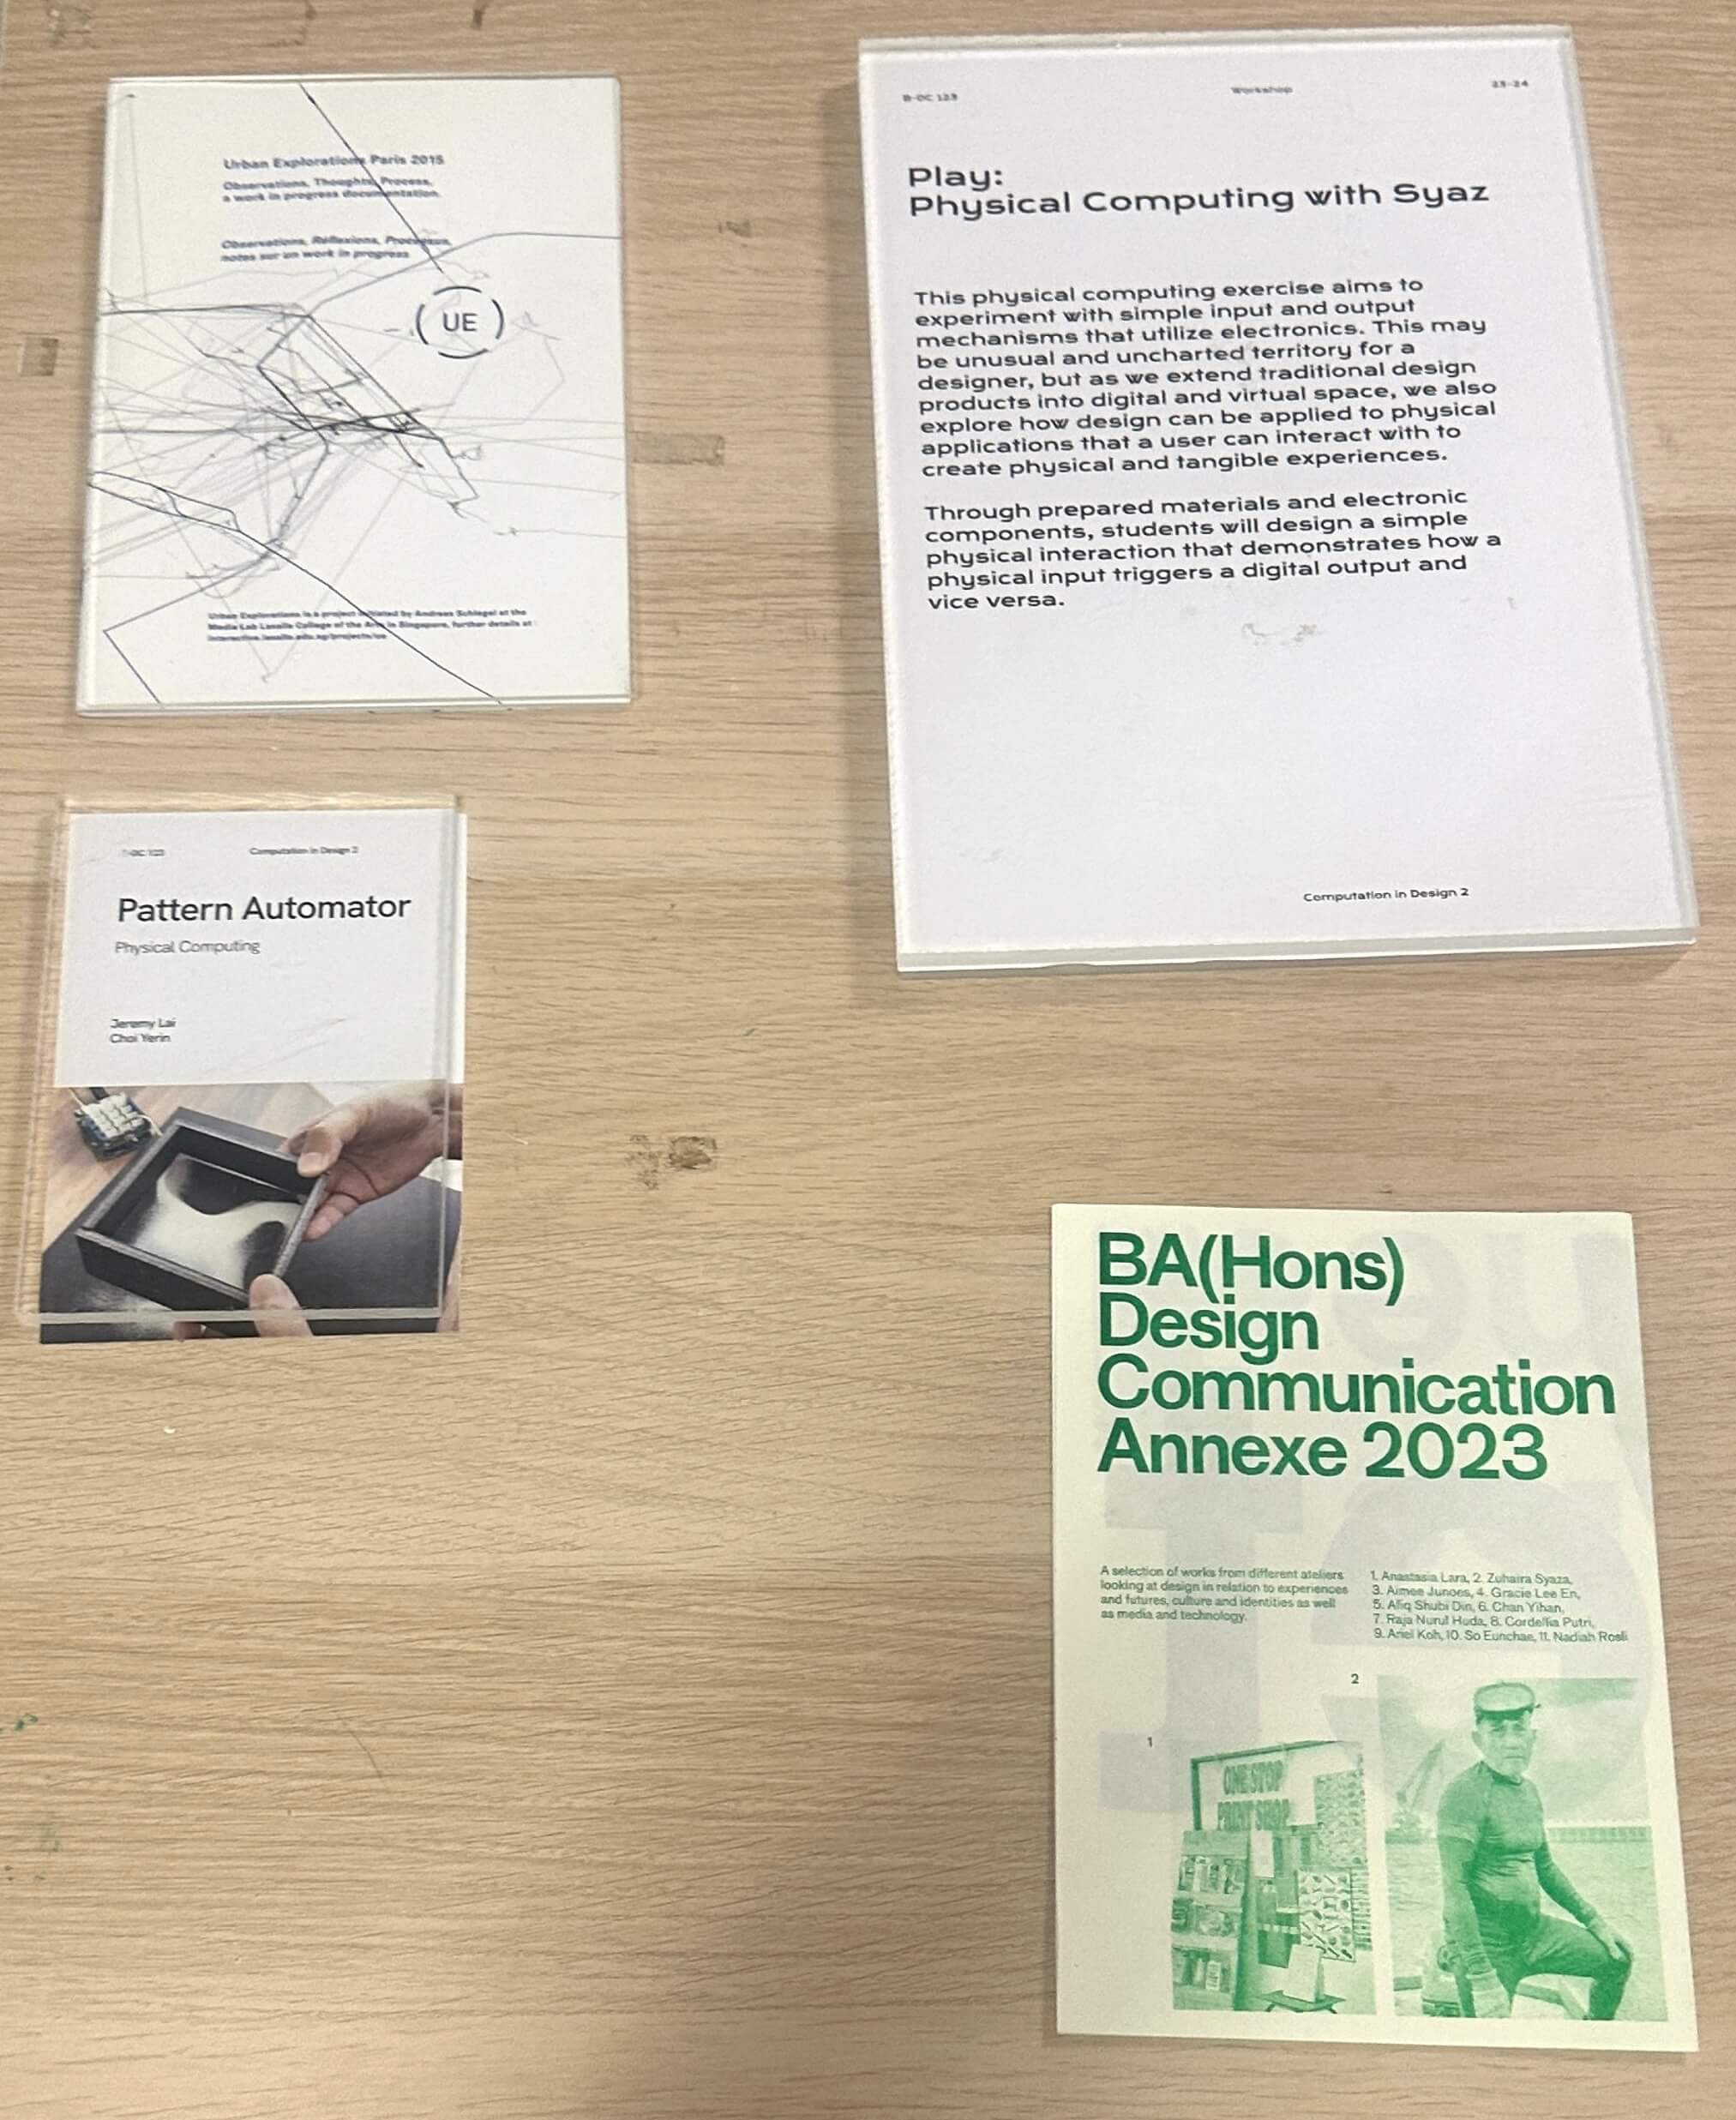
6-8mm clear acrylic sheet above descriptions to look more professional; create more layers instead of having booklets laying flat on the table